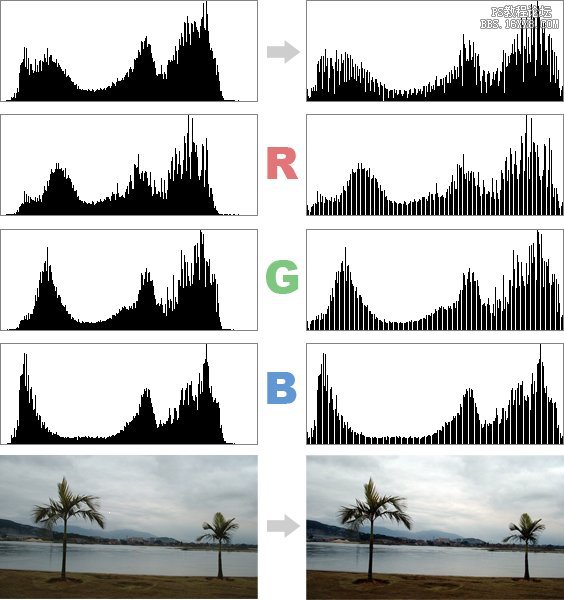
0611 There is an automatic button on the right side of the curve adjustment box. Its function is to expand the color levels in the RGB 3 channels. Full range. If the image is in CMYK mode, expand the CMY channels to the full range. However, if used improperly, it will cause color cast.
Let’s take the picture above as an example. Let’s look at the histogram of each channel and find that there is not much difference between RGB and RGB. The peaks and troughs of RGB are all in similar positions. As shown on the left side of the picture below. The effect after using the automatic function is as shown on the right side of the left picture. At the same time, you can also switch to different channels in the curve setting box to see the effect of the automatic function changing the curve.
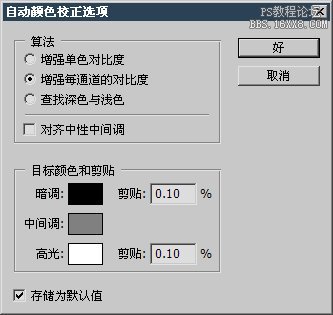
The automatic command has many modes of action. If the result is not consistent with the figure below, click the option button of the curve setting box and select the algorithm as “Enhance the contrast of each channel”. And check “Save as default” below. As shown below on the right. The remaining algorithm methods are not required to be mastered for the time being. If you are interested, you can explore them on your own after completing this lesson. We will learn about this in the next lesson.

Now we use another picture of the sky, as shown below.


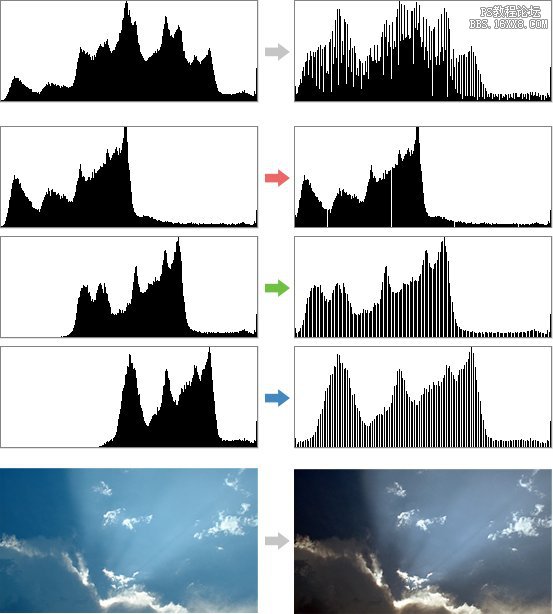
We also use the automatic function of the color level command [CTRL L] to see the effect. It is found that the color of the changed image has seriously deviated, as shown in the left picture below. Why is this? If you look carefully at the channel image before adjustment, you can see that there are no blue and green in the dark parts of the original image. After automatic adjustment, both green and blue are distributed to the dark areas, making the colors in the dark areas darker. At the same time, it can be seen that the distribution of blue in the highlight part has also been reduced after the adjustment, so the cloud light in the highlight part is no longer so blue.
You may have a question. It seems that before the adjustment, red is more distributed in the dark areas, so why are the dark parts of the image not reddish? The reason is very simple. The red histogram has more red in the dark areas, which means that most of the red only emits very weak light. In other words, the red light component in the picture is very small. Convert the histogram to brightness levels to understand. As shown in the middle picture below, there is almost no brightness in areas where red is densely distributed. If there is no brightness, of course it cannot be seen.
In the RGB color mode, whether there are highlights or dark tones, there must be certain pixels in at least two channels to reflect the high light or dark tones picture effect. If there are pixels in only one channel there is no effect. In the picture above, only red exists in the dark tone area, without green and blue. Therefore, it can be determined that this image has no dark areas. The display of the brightness histogram also proves this point.
After the adjustment, green and blue were also pulled to the dark part, and only then did the dark effect appear. This can also be seen from the brightness histogram as shown on the right below.

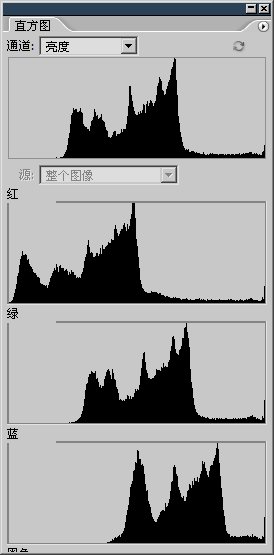

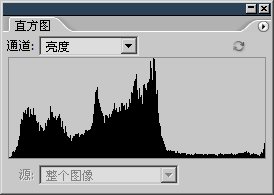

Therefore, do not equate the brightness level with the RGB level. This is a very important concept. Although mostIn this case, there is not much difference between the brightness level and the RGB level. However, the brightness level histogram should be used to determine the final lightness and darkness of the RGB three-color light mixture in the image that is truly perceived by the human eye. But when adjusting pictures, sometimes you also need to use RGB histograms, which will be introduced later.
In addition, the individual R, G, and B channel curves changed by automatic commands have no effect on the curve of the RGB integrated channel. So we can make some adjustments after using the automatic function. When actually adjusting an image, it is often necessary to combine several operations together.
0612There are three straws in the lower right corner of the curve setting box. Their functions are to set the black field![]()
![]() , set the gray point
, set the gray point ![]()
,setwhitepoint
![]() , using them to click in the image means treating the pixel at the clicked location as pure black, pure gray, or pure white. However, they may cause deviations from the original color tone of the image. In fact, they are most often used to correct color deviations.
, using them to click in the image means treating the pixel at the clicked location as pure black, pure gray, or pure white. However, they may cause deviations from the original color tone of the image. In fact, they are most often used to correct color deviations.
As shown in the left picture below, this is a leader shot on a road on an island. The overall image has a slight green cast. If you adjust it manually, you need to reduce the dark tone in the green channel curve. Since there was a motorcycle and a three-wheeled bicycle in the distance during the shooting, which ruined our composition, after research, we decided to remove these “idlers”. The finished effect is as shown on the right. We will introduce the removal method later.
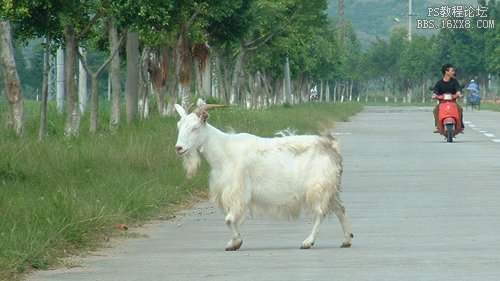


As shown in the left picture below, lower the dark tone of green. The greenish cast on the road surface in the image has been corrected. This will look more natural than the original image.
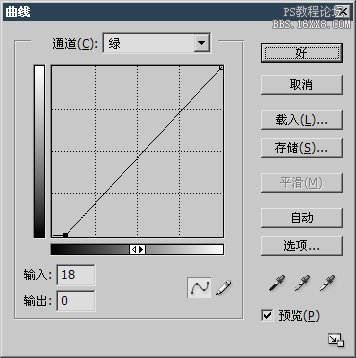

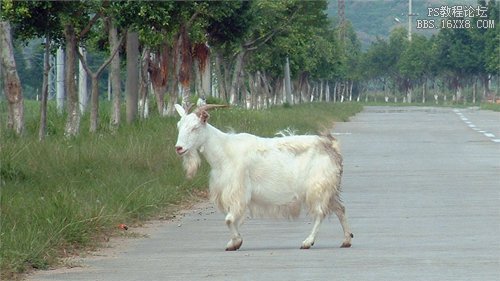

Although this adjustment method is feasible, it is more troublesome because the image needs to be corrected by vision alone, and in most cases more than one channel needs to be adjusted. For example, the picture on the right is a little bluer after adjustment, so You also need to adjust the curve of the blue channel.
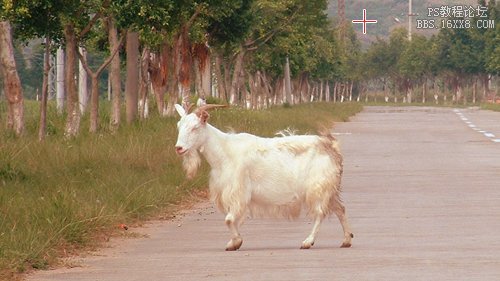
As a rule of thumb, the hair on a goat’s head should be white. So if we use the white point setting tool![]()
![]() Clicking on that place means setting the pixels here. It is pure white, that is, r255, g255, b255. Photoshop will automatically adjust the curves of the three RGB channels. For this effect, we can see the change of the red channel in the histogram view as shown on the left. . Although there are only slight changes compared to the previous two pictures, the color at this time is the most accurate.
Clicking on that place means setting the pixels here. It is pure white, that is, r255, g255, b255. Photoshop will automatically adjust the curves of the three RGB channels. For this effect, we can see the change of the red channel in the histogram view as shown on the left. . Although there are only slight changes compared to the previous two pictures, the color at this time is the most accurate.
When selecting the white point, be careful because the field setting will affect the color of all channels, which can easily cause highlight merging. Even in areas that appear to be brighter, the click effect will be very different. Take the top of the goat’s head, for example, there will be many white field effects. If you click on a slightly darker area, it will easily cause the highlights to merge. So feel for excessive highlight merging, which can cause the wool to lose texture. As shown below on the right.
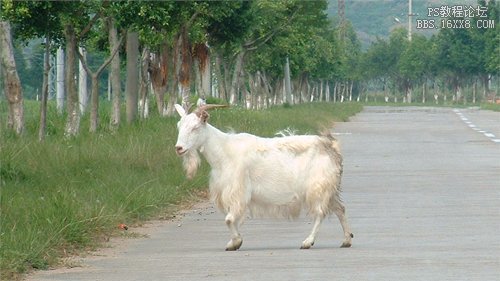

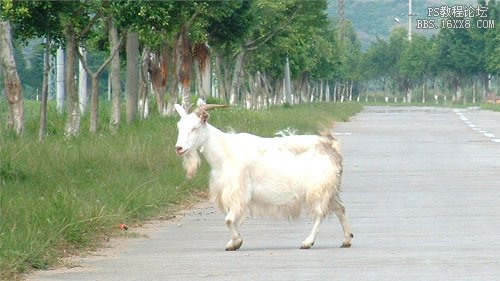

0613If the settings are incorrect, there is no need to exit the curve setting box. Press and hold the ALT key in the setting box and the original cancel button will It becomes a reset button. Clicking it at this time can undo all operations of entering the curve setting box this time. As shown below. This method is applicable to any setting dialog box with a cancel button, such as [Image>Image Size], Hue/Saturation [CTRL U], etc. This is a very useful little trick.
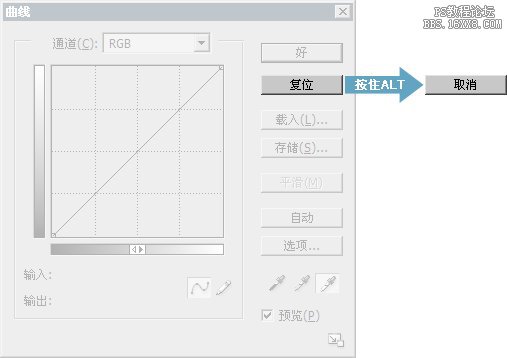

Black point setting tool![]()
![]() The same principle applies. Reduce the clicked pixel to pure black, and then adjust the curves of each channel accordingly. You can try it yourself.
The same principle applies. Reduce the clicked pixel to pure black, and then adjust the curves of each channel accordingly. You can try it yourself.
The gray point setting tool![]()
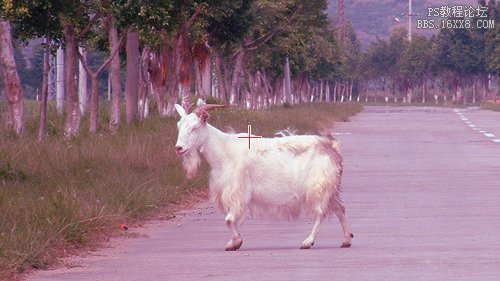
![]() Somewhat special, it removes the hue at the clicked location and turns it into grayscale (that is, the RGB values are the same). It can correct color deviation when it is inconvenient to specify white point and black point, but if used improperly, it will cause huge color deviation. So don’t set the gray point if you’re not sure. If you use a gray point to click on the green leaves in the image, it will make the entire image appear magenta. If you click on the blue mountain part at the back, it will make the image more yellow. As shown in the 2 pictures below. The red cross is the gray point designated point.
Somewhat special, it removes the hue at the clicked location and turns it into grayscale (that is, the RGB values are the same). It can correct color deviation when it is inconvenient to specify white point and black point, but if used improperly, it will cause huge color deviation. So don’t set the gray point if you’re not sure. If you use a gray point to click on the green leaves in the image, it will make the entire image appear magenta. If you click on the blue mountain part at the back, it will make the image more yellow. As shown in the 2 pictures below. The red cross is the gray point designated point.
The principle of color shift caused by specifying gray points is actually very simple. For example, specifying green as a gray point is equivalent to increasing the inverse color component of green, because in this way, green can be combined into a grayscale color. The inverse color of green is magenta. In the same way, if blue is designated as a gray point, the yellow component of the inverse color of blue will be added, making the picture appear yellowish.


The default black points of Photoshop are r0, g0, b0, the default gray points are r128, g128, b128, and the default white points are r255, g255, b255. Double-clicking these 3 icon buttons will open the color selection dialog box, where you can specify new black, gray, and white field values. If the image is in RGB mode, the RGB values of the black, gray, and white fields should be equal, that is, grayscale color. Because if you set the white point to be reddish, the image will also be reddish after using the white point setting. To ensure consistency, it is recommended to retain the default black, gray, and white field settings. If you change the black, white and gray point settings, after confirming the curve operation, Photoshop will prompt you whether to save it as the default value. If you do not save it, Photoshop will “forget” it and use the original field setting value after this operation.
<!–Collectio

 微信扫一扫打赏
 支付宝扫一扫打赏

