
Latest article
Photoshop Tutorial for Beginners: How to Use Filters Downloaded from the Internet?? – Tool Tutorial
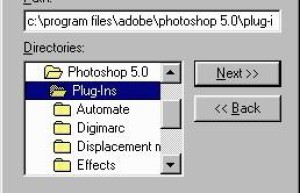
Author:Anonymous Source:68PS I have talked about getting started with Photoshop: installation and use examples of actions. Let me continue to explain how to apply some filters downloaded from the Internet. Related tutorials: Getting started with Photoshop: Installation and use of plug-in filters. 1. First find the filter file you need to install (that is, the filter file you downloaded) and then select and copy it. This article uses a sine filter 2. Find Plug-in > Filter in the directory where ps is installed and then paste the file you just copied into this directory 3. Close ps and reopen it. Select the menu: Filter. You can find the filter you just installed by dropping down the menu. 4. Use filters on the pictures that need to be added to get the effects you want Author:Anonymous Source:68PS I have talked about getting started with Photoshop: installation and use examples of actions. Let me continue to explain how to apply some filters downloaded from the Internet. Related tutorials: Getting started with Photoshop: Installation and use of plug-in filters. 1. First find the filter file you need to install (that is, the filter file you downloaded) and then select and copy it. This…
Photoshop Beginner Tutorial: Teach you how to install actions – Tool Tutorial
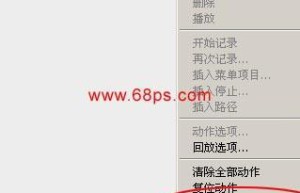
I talked about getting started with Photoshop: How to use the downloaded brushes? , continue to explain how to apply some actions downloaded online? 1. First open the action panel, click on the drop-down menu on the right as shown in Figure 1, and select the loading action 2, select the action file to load 3. After loading, we can find the action just loaded under the action panel. 4. Open the picture we want to add action to, and then select the action as shown in Figure 4 5. Click the start button below the panel as shown in Figure 5, and you can see the rendering. <!–Collectio
Photoshop tutorial for beginners: How to use the downloaded brushes? – Tool tutorial
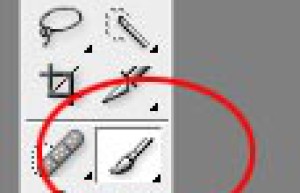
Author:Anonymous Source:68PS Continuing with the previous tutorial, getting started with Photoshop: How to use custom shapes? Continue to explain the specific applications of Photoshop brushes. There are many wonderful Photoshop brushes on the Internet for everyone to download, but many friends are not very good at using them. Let’s take a look at how to install and use Photoshop brushes. First put the decompressed Photoshop brush file in a folder for later installation and use, and remember the path where the file is located. 1. Open Photoshop and click the Stroke tool. As shown in Figure 1 2. Select from the menu of settings for Brush “Load Brush”. As shown in Figure 2 3. Find the folder where you put the brushes, click on the brush you want to use and click “Cut”. 4. You can load several brush files. You can see your loaded brushes here. The princess crown brush shown in Figure 4 5. Choose your brush size and color. It’s better to create a new layer and now you can paint freely with a new brush. 6. If you want to use the original brush. Select “Reset Brush” from the menu to return to the original brush…
Photoshop tutorial for beginners: How to use custom shapes downloaded from the Internet? – Tool tutorial
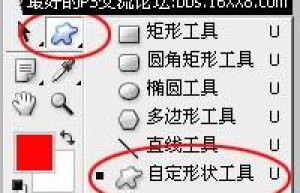
Author:Anonymous Source:68PS Continue the previous tutorial, Getting Started with Photoshop: Installation and Use of External Patterns, and explain the use of custom shape tools. 1. First open photoshop and select the custom shape tool in the toolbox as shown in Figure 1 2. Click the small triangle in the top property bar as shown in Figure 2 and select “Load Shape” 3. Select the shape file you want to load and click Load 4. After loading, you can see the shape you just loaded. 5, select the appropriate color and we can draw the loaded shape. <!–Collectio
Photoshop Tutorial for Beginners: Installation and Use of Plug-in Filters – Tool Tutorial
Today continue to learn how to use plug-in filters in Photoshop. Unlike Photoshop’s internal filters, external filters require users to install them themselves. There are two ways to install external filters: one is an encapsulated external filter, which can be installed by the installation program; the other is a filter file placed directly in the directory. The method to install a filter is very simple, just copy the filter file and some of its attached files to “Photoshop\PlugIns”. First find the directory where the filter is located, such as the filter directory produced by different companies under PlugIns in the root directory of the CD. Enter these directories, and you will find that in addition to the filter files 8bf and 8bi, there are also some help files, asf, and dll. and other files, the general installation file is to copy this directory together to the filter directory of Photoshop. The next time you enter Photoshop, open the “Fitler” menu and you will find the newly installed filter; in addition, in order to save space, also You can copy the filter file in the filter directory to the filter directory of Photoshop, but be careful: when copying, you should check…
Photoshop Tutorial for Newbies: How to Install and Use PS Actions – Tool Tutorial
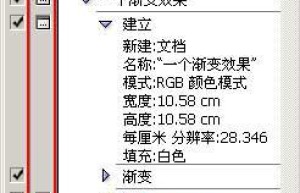
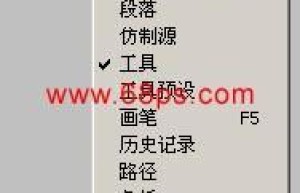
Author:Anonymous Source:IT WorldToday we continue to learn how to use “Action” in Photoshop? “Action” (Action) is a very important function in Photoshop. It can record the entire process of image processing in detail, and can be used in other images. This is very convenient for images that need to be processed the same. fast. Understanding Below is an “Action” panel. The “Default Action” action sequence is installed by default in PhotoShop. There are many actions in it. Just click on the triangle in front of each action. You can see that there are many commands, that is, this action requires these commands to be completed; the black box at the bottom is the editing control bar of the action, where we can play, record, stop, create, delete and other operations on the action. (Picture 1) When you click the triangle in front of the action command, all the parameters of the command will pop up, so that you can understand the action in detail. (Picture 2) Example Let’s do a simple example below. First, we need to create a new action sequence, because all actions are included in the action sequence. Click the “New Sequence” button under the action panel.…

Photoshop Beginner Tutorial: Drawing Shapes with Various Shape Tools – Tool Tutorial
Earlier we introduced the introduction to Photoshop: the use of drawing tools. Today we introduce the use of various shape tools in Photoshop. Adding shapes to your images is easy with Adobe Photoshop: you can draw shapes using a variety of shape tools, or choose from a large selection of pre-drawn shapes. Vector shapes can be arranged on separate layers for easy modification and overlay effects. In this tutorial, you’ll add background and foreground shapes to an image, and learn a little about gradient effects and layer effects. 1. Open the image in Photoshop. Choose File > Open, or double-click the thumbnail in the file browser. For this tutorial, you’ll probably want to start with an image that has at least two layers. We added shapes first to create a more interesting background in the image. 2. Select the Rectangle tool. Select the Rectangle tool from the toolbox. By default, the Shape Layers button in the options bar is selected. Use this option to create a vector shape that is automatically placed on a new layer. (You can create a path or rasterized shape on the current layer by using the adjacent icon in the palette.) 3. Create a rectangular…

Photoshop Tutorial for Beginners: How to Use Drawing Tools – Tool Tutorial
In the previous course, we learned the two basic concepts in Photoshop, namely selection and layer (layer mask), as well as other contents derived from them, such as color adjustment. You may be confused that we have not listed channels as “key points”. This is because although channels are useful, they do not affect most productions if they are not used at all. Therefore, channels are not used very frequently in practice, especially In web design, channels are rarely used. In future courses we will also encounter the “vessel” of Photoshop: paths. After learning the path, everyone will have complete design capabilities, and our course will also enter the Illustrator part. Related articles: Getting Started with Photoshop: Installation and Use of External Patterns Some of the many tools located in the toolbar have already been used, namely the selection tool, move tool, and brush tool. These are the three commonly used tools. The function of the marquee tool is to create a selection. Use it if you need to create a selection. The move tool should be the most commonly used because it is needed for image layout. This is not limited to movement, but also combinations with keys such…
Photoshop Beginner Tutorial: Gradient Installation and Usage Tutorial – Tool Tutorial
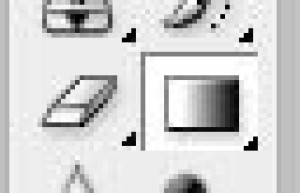
1. First open photoshop and select the gradient tool in the toolbox as shown in Figure 1 2. Click the small triangle in the top property bar as shown in Figure 2 and select “Load Gradient” 3, find the gradient file you want to load, and then load it 4, after loading, you can see the gradient you just loaded 5. Use the gradient tool to easily draw the simple effect we want. <!–Collectio
Photoshop Beginner Tutorial: Style Installation and Usage Tutorial – Tool Tutorial
1. First open photoshop, bring up the style control panel, and select the menu: Window > Style as shown in Figure 1 2. Click the small triangle on the right side of the style panel. You will see a row of drop-down menus. Select the loading style as shown in the figure. 2 3. Select the style file you downloaded and unzipped, and click Load 4, after loading, you can see the style you just loaded on the style panel, as shown in Figure 4 5. Select the graphics or text you want to style, and click the style pattern to apply the effect. 6. If you feel that the style effect is not good, you can right-click on the style and select delete style. 7, you can also save the style of your own style panel by selecting the storage style above in Figure 7. <!–Collectio

