
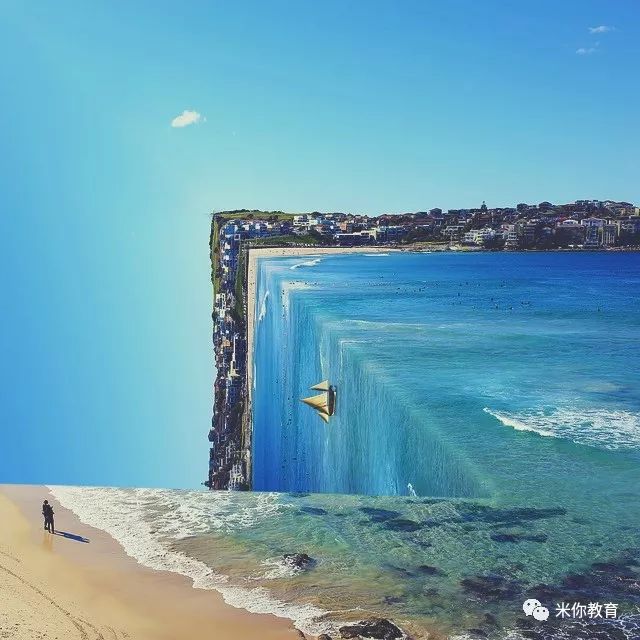
Today we are learning a small synthesis to create a three-dimensional space effect. The operation is quite simple. Let’s take a look at the renderings.
Production steps
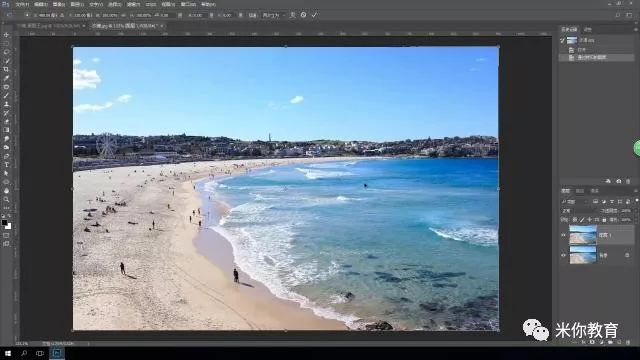
First step
First open the prepared beach material and copy one layer.

www.16xx8.com
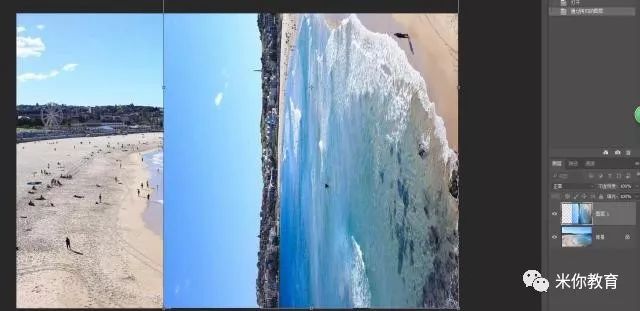
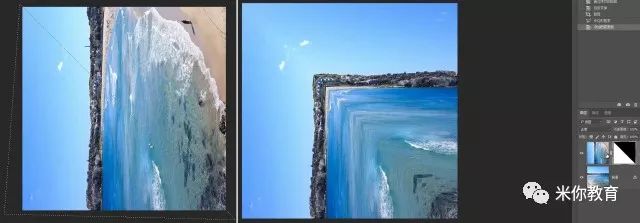
Step Two
Freely transform the copied material into the following state. This can achieve symmetry between the lower left corner and the upper right corner.
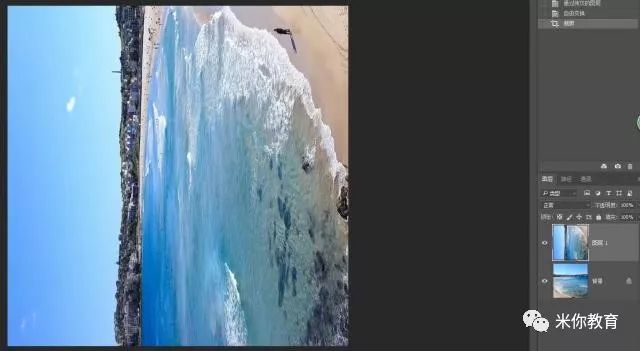
Step Three
Use the Crop tool to crop out the unwanted area on the left side.
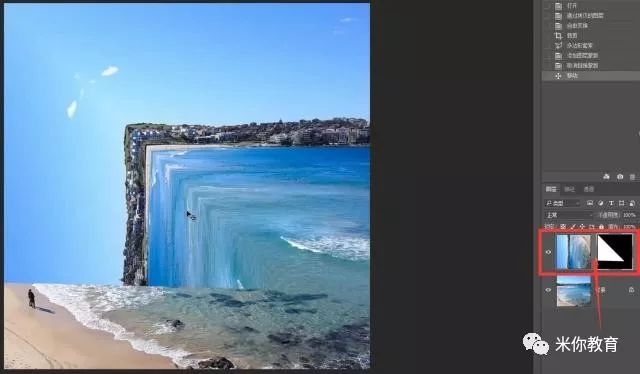
Step 4
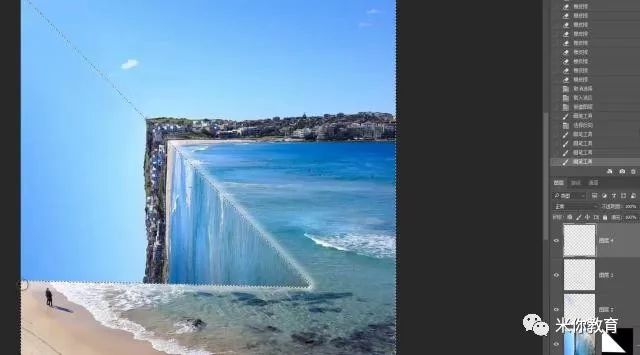
Use the polygon tool to create a selection in the lower left corner, and directly add a layer Mask to hide the outside of the selection, thus forming a symmetrical effect between the lower left corner and the upper right corner
Step 5
Complete symmetry is visually false, so we cancel the link between the layer and the mask, use the move tool to move the layer mask to the upper left, and pay attention to the alignment of the house area in the distance.
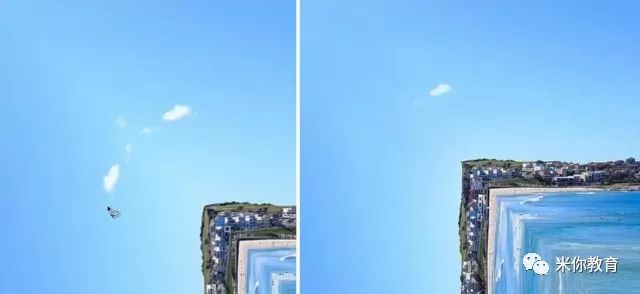
Step 6
Use content-aware fill to repair the clouds in the sky, making the joints appear less symmetrical and form a whole.
Step Seven
The water area also has a very stiff connection. Select the mask and execute [Filter-Blur-Gaussian Blur] to soften the boundary.
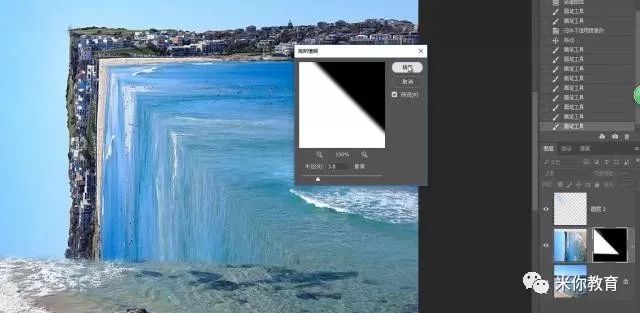
Step 8
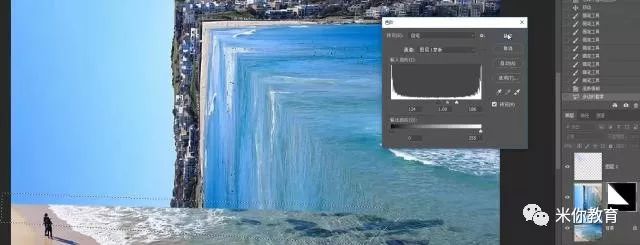
Because of the softening done in the previous step, the water on the right looks well blended, but the bottom of the water looks too blurry. Use the lasso to frame the bottom of the column and turn on the color levels to adjust the mask to make the border less blurry.
Step 9
Next, deal with the relationship between light and dark. Press Ctrl and click on the layer mask, load the selection, and add shadows to the gaps between the ground and the water.

Step 10
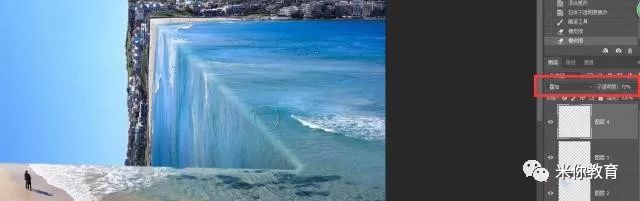
Invert the selection, use a soft-angled brush to reduce the opacity, and paint highlights at the turning points of the water.
Step 11
Don’t make the highlights too bright, change the blending mode to Overlay, and lower the layer transparency appropriately.
Step 12
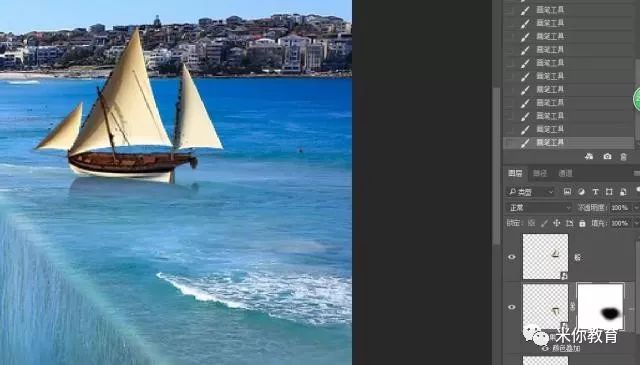
Add the boat material, then copy the boat and flip it vertically, make the copied boat black, use a mask to create a shadow effect, adjust the size appropriately, and place it wherever you want.

Step Thirteen
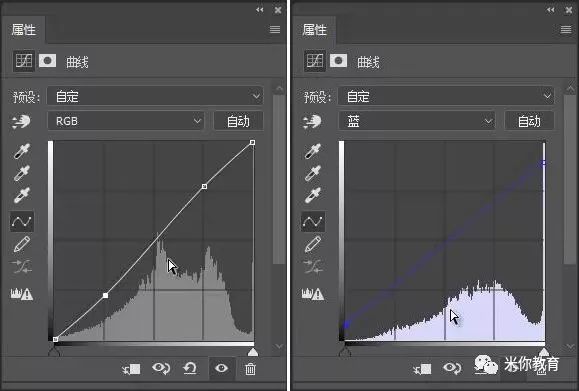
Now that it’s basically done, the final step is color grading. Start by adding contrast through curves. in RGB passThe channel adjusted the contrast between light and dark, and added color contrast in the blue channel.
Step 14
Take a look at the comparison before and after adjustment

Step 15
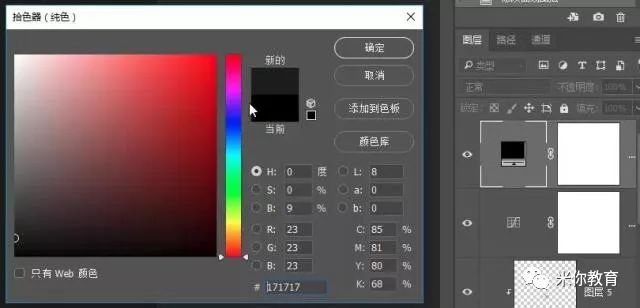
Continuing to soften the color of the photo, create a solid color layer and set the color to a darker gray.
Step 16
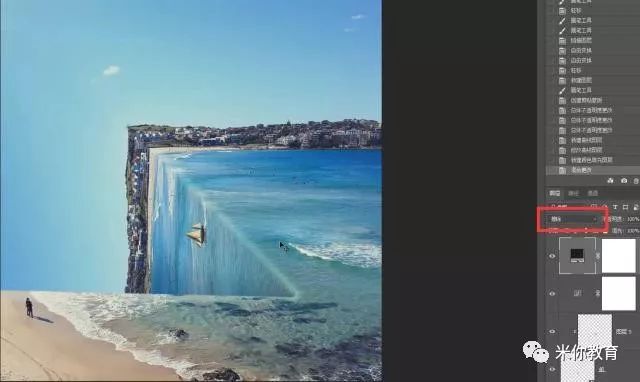
Change the blending mode to Exclude to make the highlights of the photo look less harsh and the overall light and dark to be softer.
Step 17
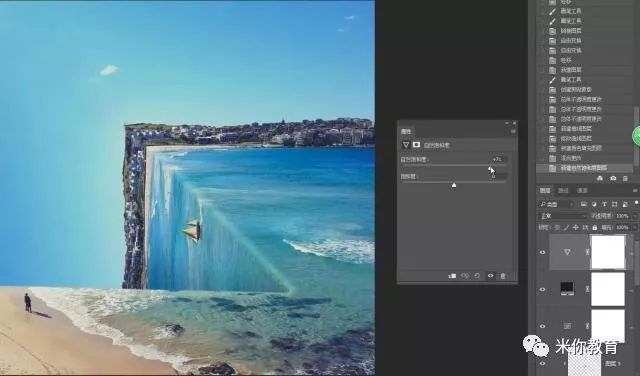
But there is also a problem, that is, the photo is slightly grayish and the color is not saturated enough. We then increase the saturation of the photo through natural saturation.
Final result:
This case does not use too many materials and is relatively easy to integrate and adjust. It is very suitable for beginners to practice. If you want to learn synthesis, start with this case.
Today we are learning a small synthesis to create a three-dimensional space effect. The operation is quite simple. Let’s take a look at the renderings.
Production steps
First step
First open the prepared beach material and copy one layer.
www.16xx8.com
Step Two
Freely transform the copied material into the following state. This can achieve symmetry between the lower left corner and the upper right corner.
Step Three
Use the Crop tool to crop out the unwanted area on the left side.
Step 4
Use the polygon tool to create a selection in the lower left corner, and directly add a layer Mask to hide the outside of the selection, thus forming a symmetrical effect between the lower left corner and the upper right corner
Step 5
Complete symmetry is visually false, so we cancel the link between the layer and the mask, use the move tool to move the layer mask to the upper left, and pay attention to the alignment of the house area in the distance.
Step 6
Use content-aware fill to repair the clouds in the sky, making the joints appear less symmetrical and form a whole.
Step Seven
The water area also has a very stiff connection. Select the mask and execute [Filter-Blur-Gaussian Blur] to soften the boundary.
Step 8
Because of the softening done in the previous step, the water on the right looks well blended, but the bottom of the water looks too blurry. Use the lasso to frame the bottom of the column and turn on the color levels to adjust the mask to make the border less blurry.
Step 9
Next, deal with the relationship between light and dark. Press Ctrl and click on the layer mask, load the selection, and add shadows to the gaps between the ground and the water.
Step 10
Invert the selection, use a soft-angled brush to reduce the opacity, and paint highlights at the turning points of the water.
Step 11
Don’t make the highlights too bright, change the blending mode to Overlay, and lower the layer transparency appropriately.
Step 12
Add the boat material, then copy the boat and flip it vertically, make the copied boat black, use a mask to create a shadow effect, adjust the size appropriately, and place it wherever you want.
Step Thirteen
Now that it’s basically done, the final step is color grading. Start by adding contrast through curves. The contrast of light and dark is adjusted in the RGB channel, and the contrast of color is increased in the blue channel.
Step 14
Take a look at the comparison before and after adjustment
Step 15
Continuing to soften the color of the photo, create a solid color layer and set the color to a darker gray.
Step 16
Change the blending mode to Exclude to make the highlights of the photo look less harsh and the overall light and dark to be softer.
Step 17
But there is also a problem, that is, the photo is slightly grayish and the color is not saturated enough. We then increase the saturation of the photo through natural saturation.
Final result:
This case does not use too many materials and is relatively easy to integrate and adjust. It is very suitable for beginners to practice. If you want to learn synthesis, start with this case.
 微信扫一扫打赏
 支付宝扫一扫打赏

