
<pThis is a synthetic video tutorial translated from a foreign master "rafy A". The techniques used in the tutorial are relatively simple, and the tutorial steps also focus on explaining the basic steps. The main purpose is to learn other people's creativity. Video downloads are provided below the tutorial, and you can study together with the graphic tutorial.
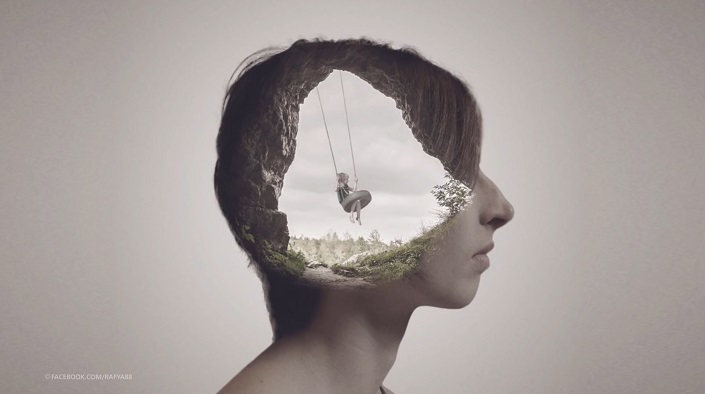
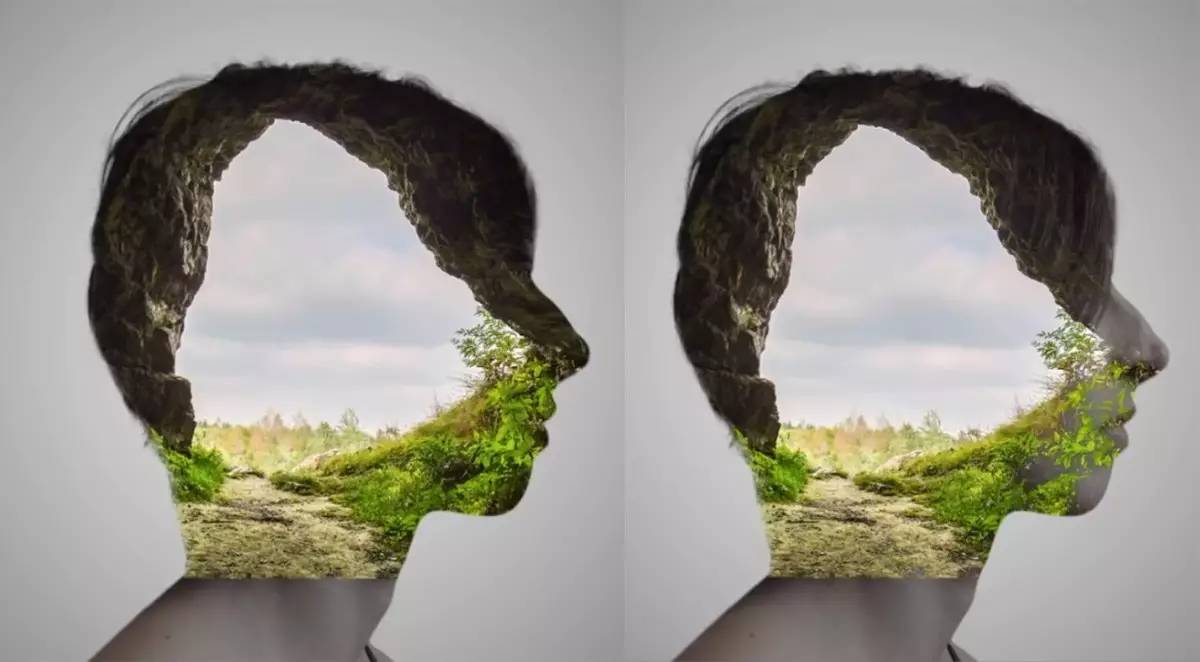
The original image effect is as follows:
Video tutorial: http://pan.baidu.com/ Password: yiui
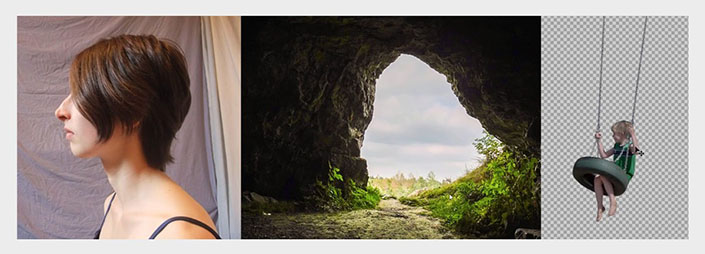
Materials used:
Pictures of women: http://www.16xx8.com/photoshop/sucai/2016/r374106.html
Cave pictures: http://www.16xx8.com/photoshop/sucai/2016/k351793.html
Children’s pictures: http://www.16xx8.com/photoshop/sucai/2016/l15682.html
The steps are as follows:
1. Dealing with characters
Cut out people
Open the character material and use the “Quick Selection Tool” to select a selection of the character, add a layer Mask to cut out the character, and then use the “Adjust Edge” tool to process the character’s hair. Then create a new canvas of 2300X1400px, 72dpi, and place the character in the middle of the canvas.

www.16xx8.com
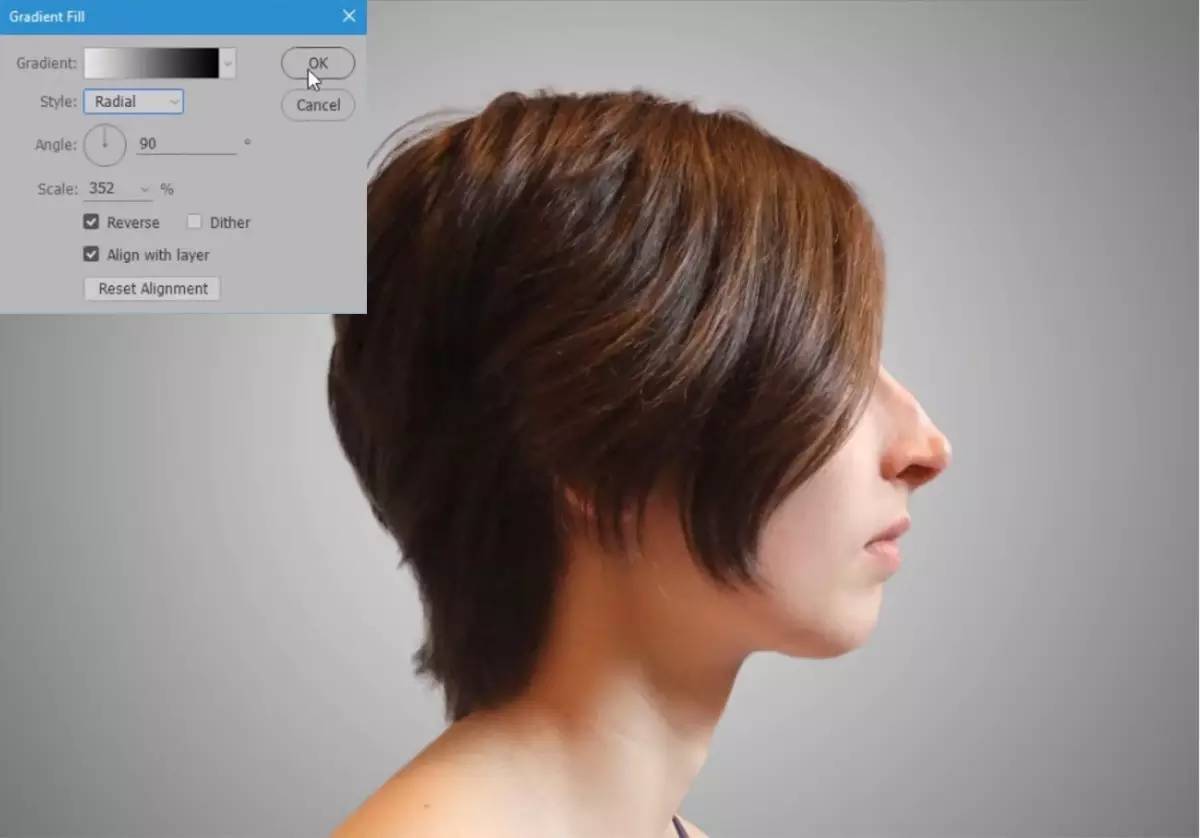
Make background
Create a new “Gradient” channel below the character layer (gradient color: black – color value e8e8e8, radial gradient, 90 degrees, zoom 352%, reverse check).
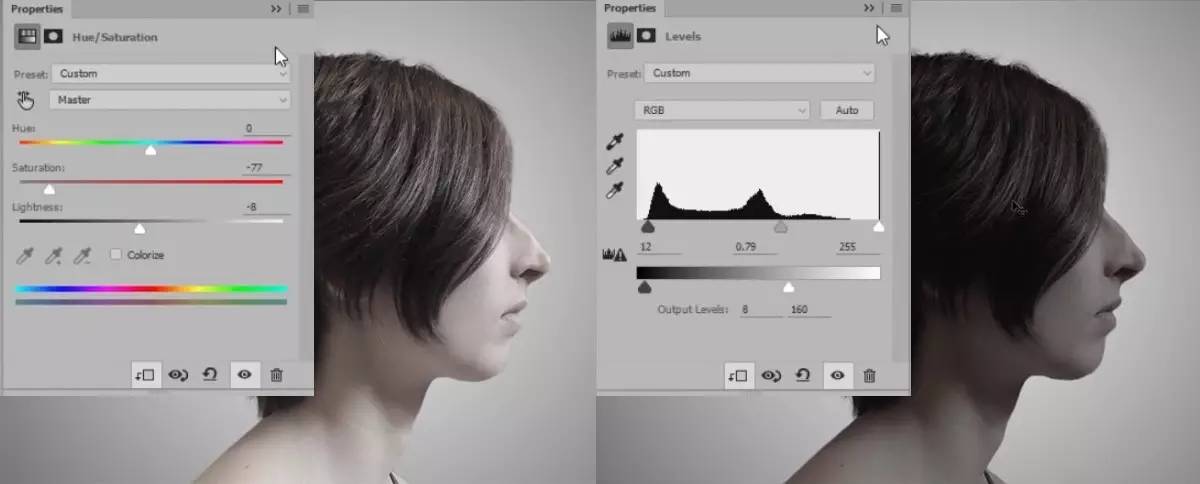
Adjust character color
Place the “Hue/Saturation” channel above the character layer (Saturation: -77, Lightness: -8), and then place the “Level” channel (Histogram value: 12/0.79/255, Gradient bar value: 8 /162).
2. Open your imagination
Open your imagination
Open the cave material, add a mask to cover the outside of the character selection, and change the layer mode to Color Dodge.
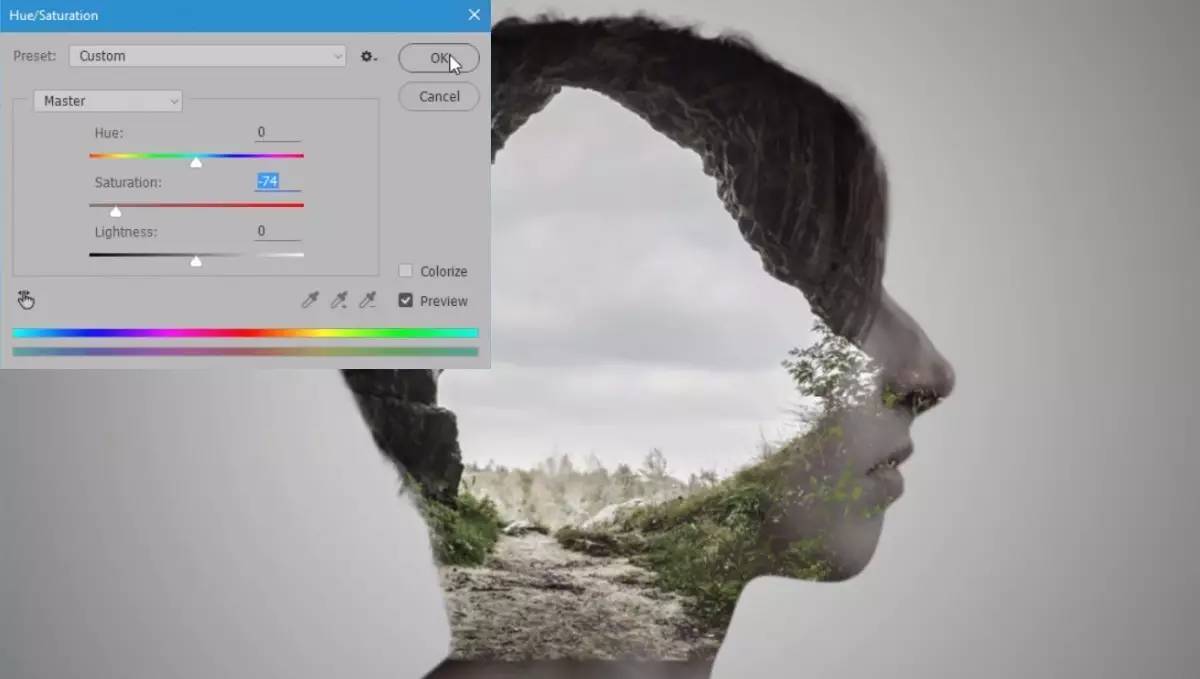
Adjust the color of imagination
Execute the “Hue/Saturation” command (Saturation: -74) on the imagination layer to reduce the saturation.
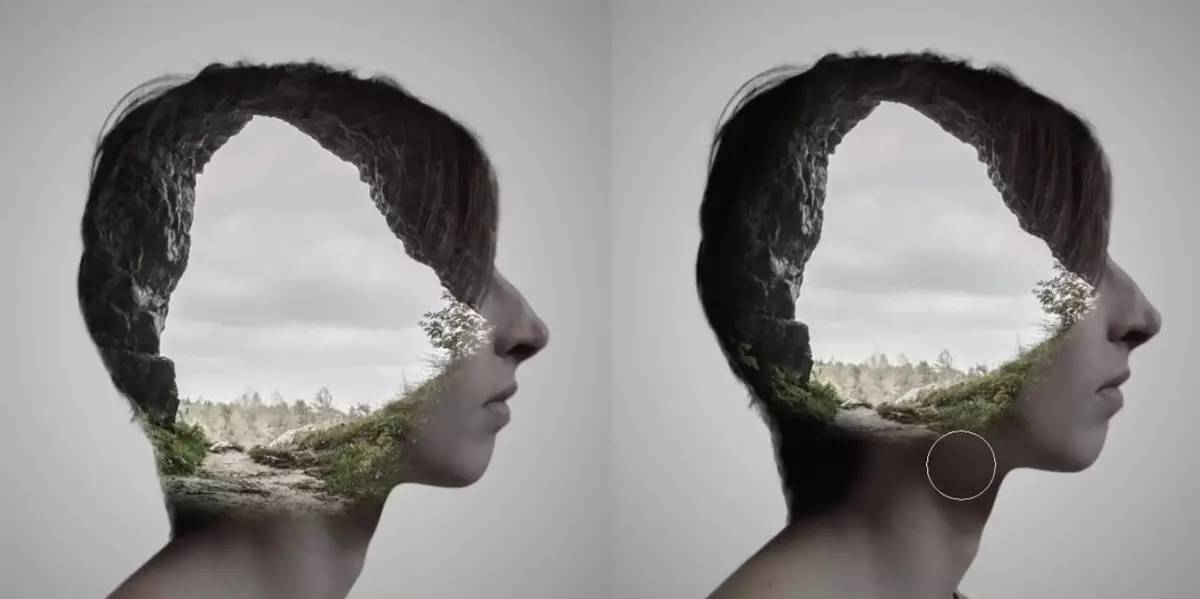
Integrate characters and imagination
Use a black soft light brush on the brain hole layer mask to cover the ground below the hole and the excess parts of the nose and lips. Next, let’s shrink the layer a little, move it up a little, and erase the character’s hair a little bit.
Join the kids on the swing
Drag the child material into the screen, flip it horizontally, and move it to the appropriate size. Execute the “Hue/Saturation” command (Saturation: -79, Lightness: -10) to reduce the saturation. Copy and cut the chain part of the swing into one layer and join it to the top of the hole.
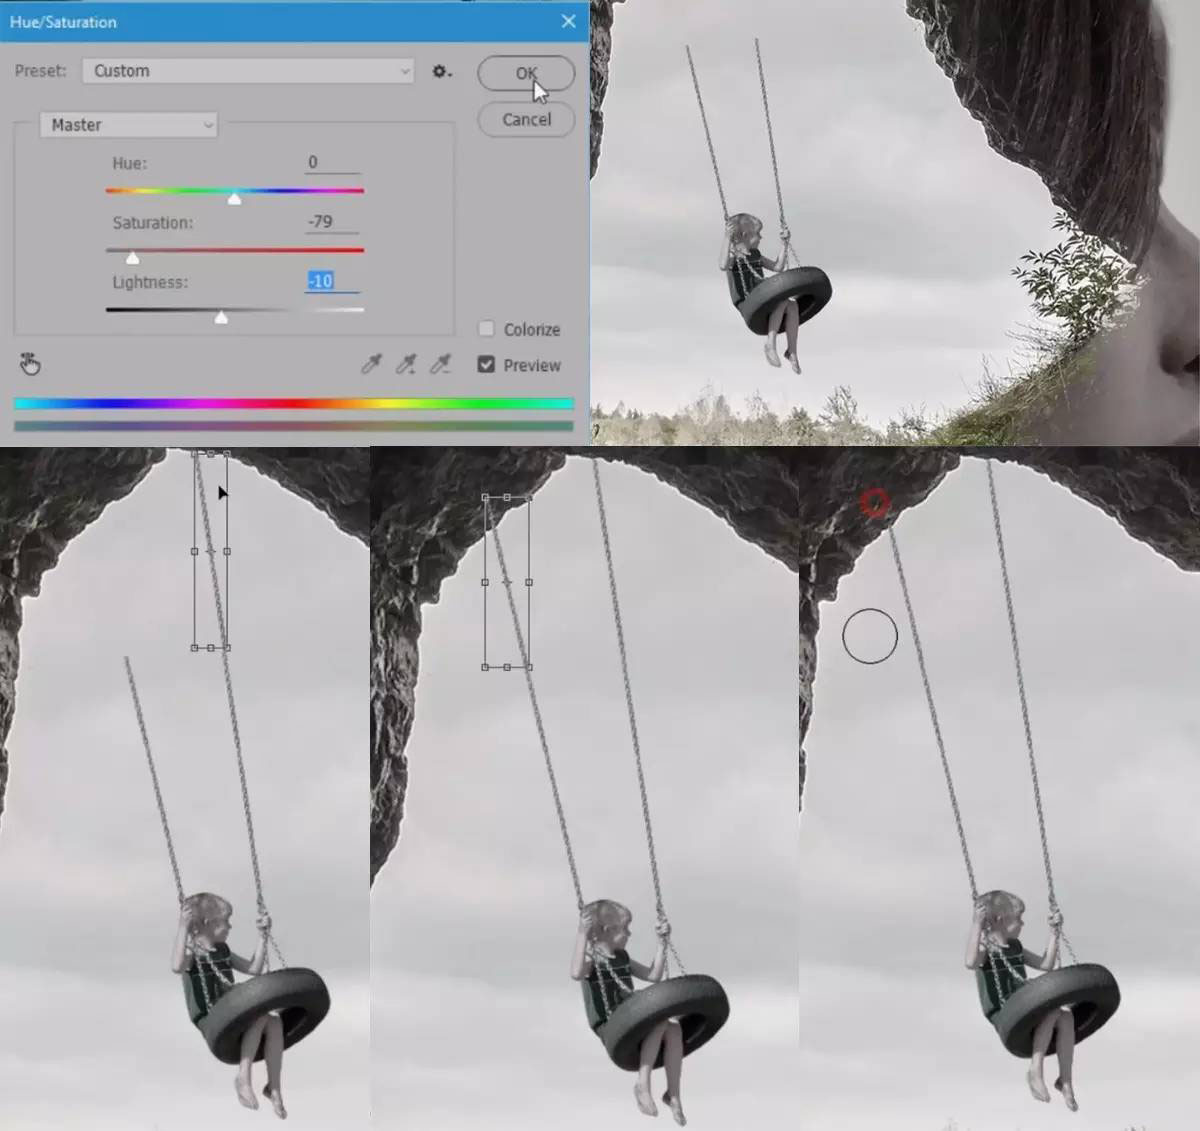
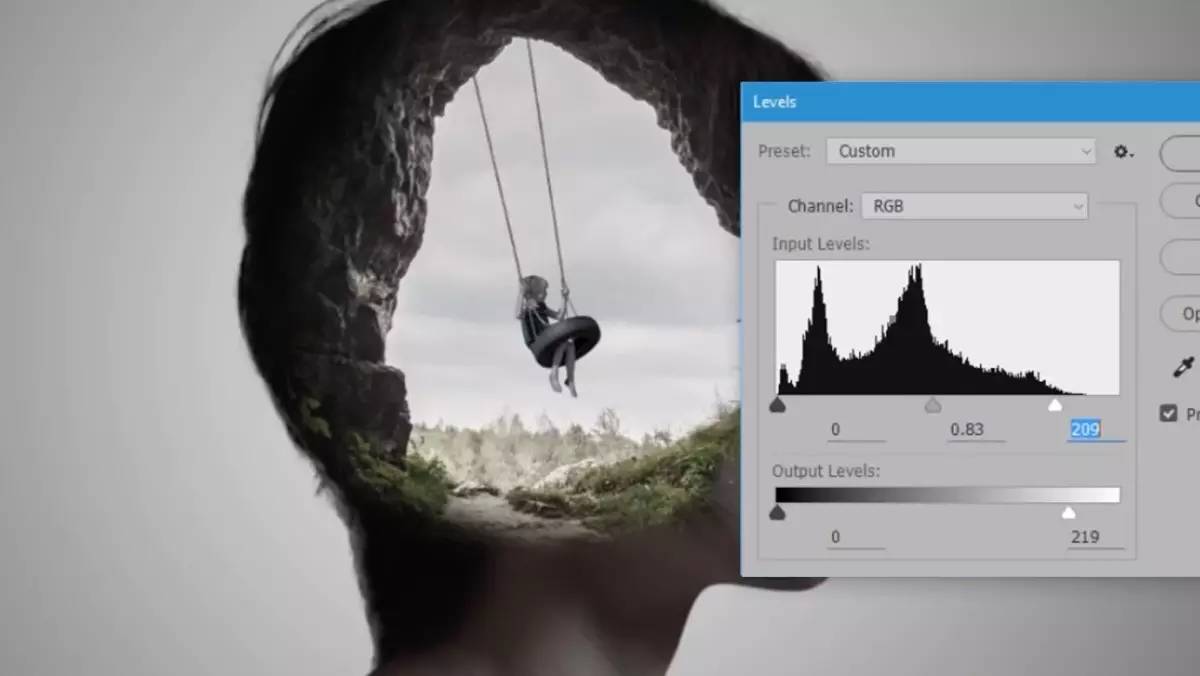
Execute the command “Levels” (histogram value: 0/0.83/209, gradient bar value: 0/219) to darken the entire little boy layer.
3. Overall color matching
Overall tone adjustment
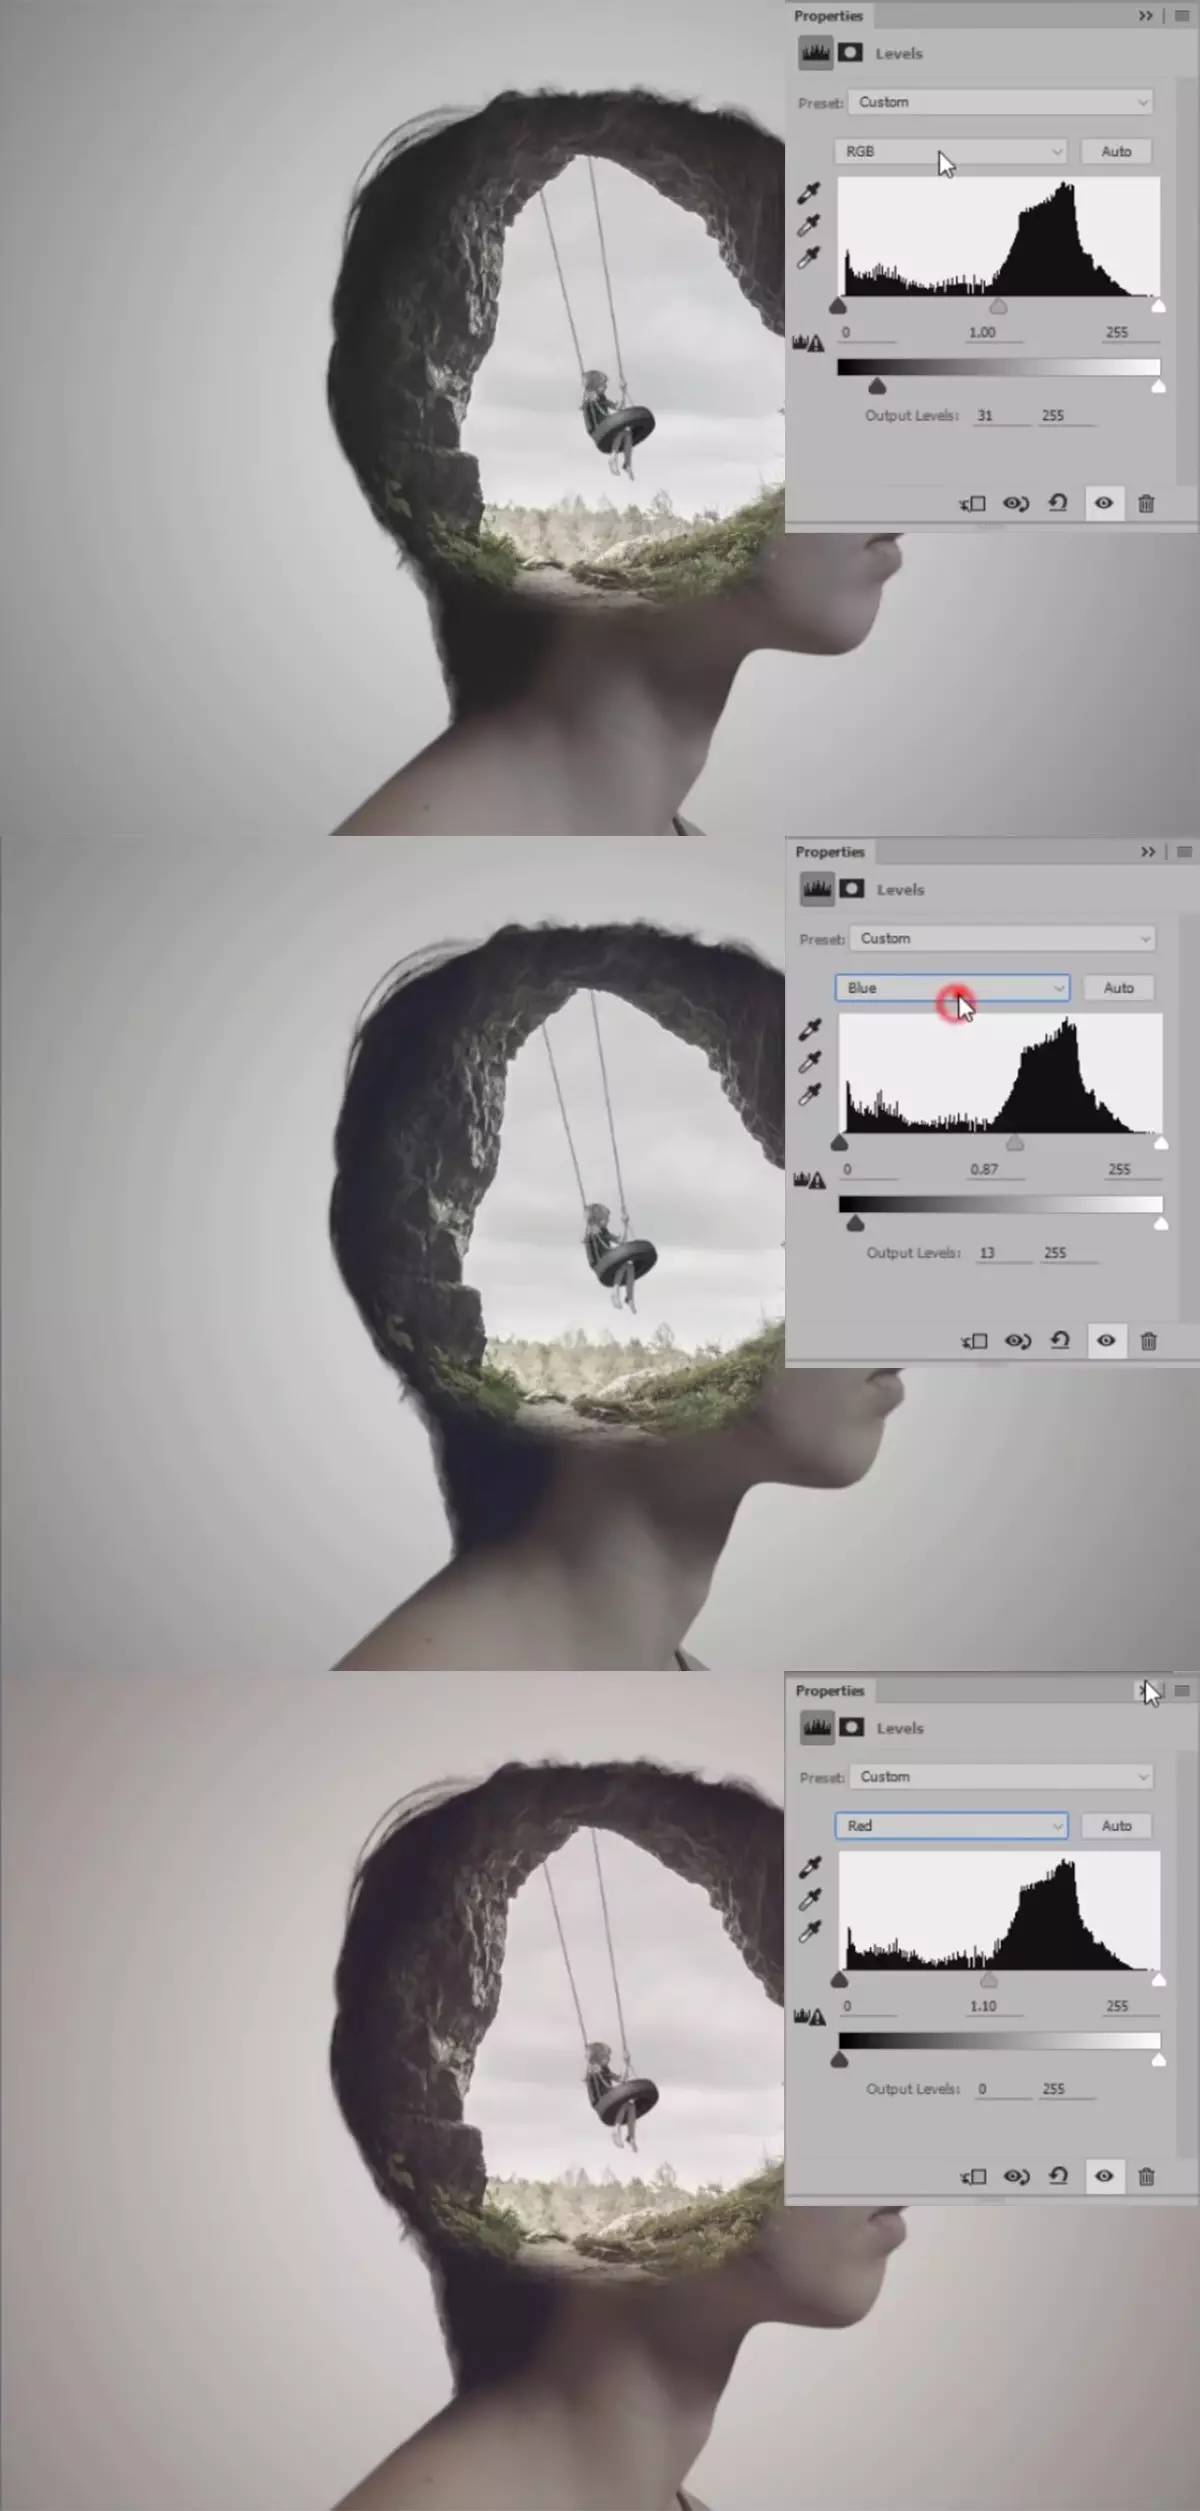
Create a new “Levels” channel at the top of the layer, and adjust each color channel to adjust the overall tone. The specific parameters are as follows.
<pThis is a synthetic video tutorial translated from a foreign master "rafy A". The techniques used in the tutorial are relatively simple, and the tutorial steps also focus on explaining the basic steps. The main purpose is to learn other people's creativity. Video downloads are provided below the tutorial, and you can study together with the graphic tutorial.
The original image effect is as follows:
Video tutorial: http://pan.baidu.com/ Password: yiui
Materials used�
Pictures of women: http://www.16xx8.com/photoshop/sucai/2016/r374106.html
Cave pictures: http://www.16xx8.com/photoshop/sucai/2016/k351793.html
Children’s pictures: http://www.16xx8.com/photoshop/sucai/2016/l15682.html
The steps are as follows:
1. Dealing with characters
Cut out people
Open the character material and use the “Quick Selection Tool” to select a selection of the character, add a layer Mask to cut out the character, and then use the “Adjust Edge” tool to process the character’s hair. Then create a new canvas of 2300X1400px, 72dpi, and place the character in the middle of the canvas.
www.16xx8.com
Make background
Create a new “Gradient” channel below the character layer (gradient color: black – color value e8e8e8, radial gradient, 90 degrees, zoom 352%, reverse check).
Adjust character color
Place the “Hue/Saturation” channel above the character layer (Saturation: -77, Lightness: -8), and then place the “Level” channel (Histogram value: 12/0.79/255, Gradient bar value: 8 /162).
2. Open your imagination
Open your imagination
Open the cave material, add a mask to cover the outside of the character selection, and change the layer mode to Color Dodge.
Adjust the color of imagination
Execute the “Hue/Saturation” command (Saturation: -74) on the imagination layer to reduce the saturation.
Integrate characters and imagination
Use a black soft light brush on the brain hole layer mask to cover the ground below the hole and the excess parts of the nose and lips. Next, let’s shrink the layer a little, move it up a little, and erase the character’s hair a little bit.
Join the kids on the swing
Drag the child material into the screen, flip it horizontally, and move it to the appropriate size. Execute the “Hue/Saturation” command (Saturation: -79, Lightness: -10) to reduce the saturation. Copy and cut the chain part of the swing into one layer and join it to the top of the hole.
Execute the command “Levels” (histogram value: 0/0.83/209, gradient bar value: 0/219) to darken the entire little boy layer.
3. Overall color matching
Overall tone adjustment
Create a new “Levels” channel at the top of the layer, and adjust each color channel to adjust the overall tone. The specific parameters are as follows.
 微信扫一扫打赏
 支付宝扫一扫打赏

