@野鹿志:
This tutorial combines PS and AI to create an origami effect letter poster. The text perspective and splicing of this effect can actually be done in PS. Students who like to use PS can complete it in PS. The same, according to Just make your own choice based on your own habits. The whole poster is very creative. Students can learn from the poster to make designs in other styles. With the guidance of the video, I believe students can do great. Let’s learn the specific tutorials through the tutorial.
Tutorial material: http://www.16xx8.com/photoshop/sucai/2018/s968719.html
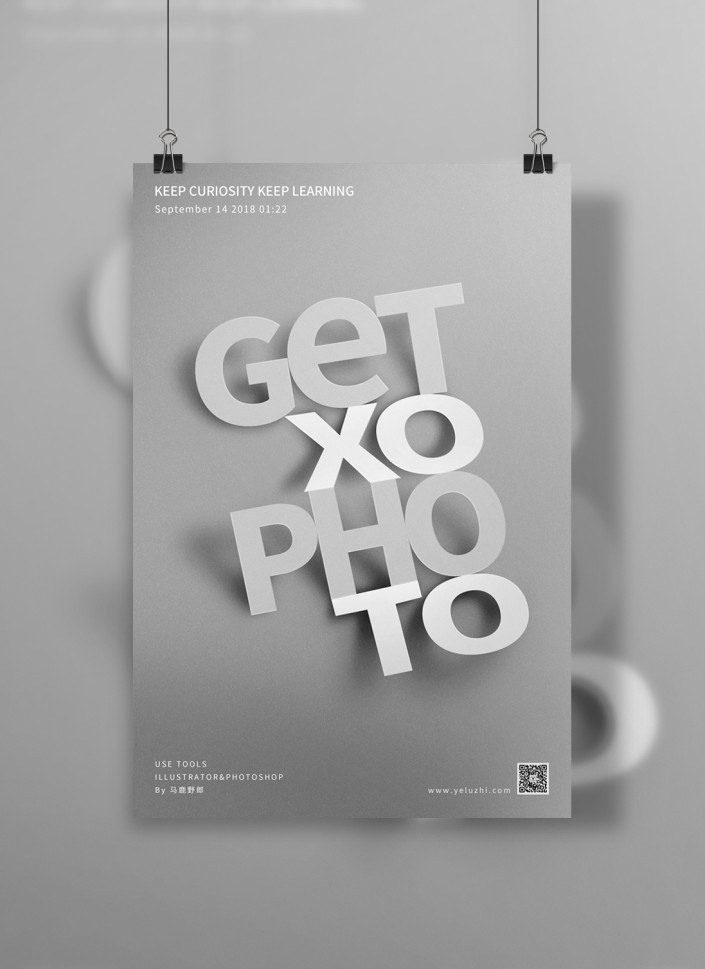
Rendering:
www.16xx8.com
Video:
Operation steps:
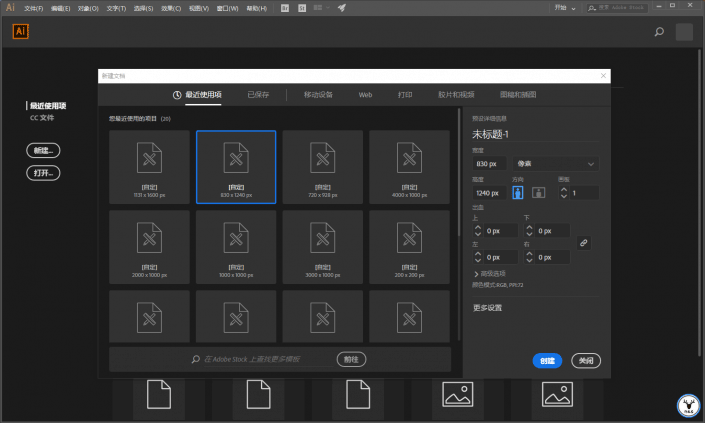
Open Ai to create a new drawing board of any size:
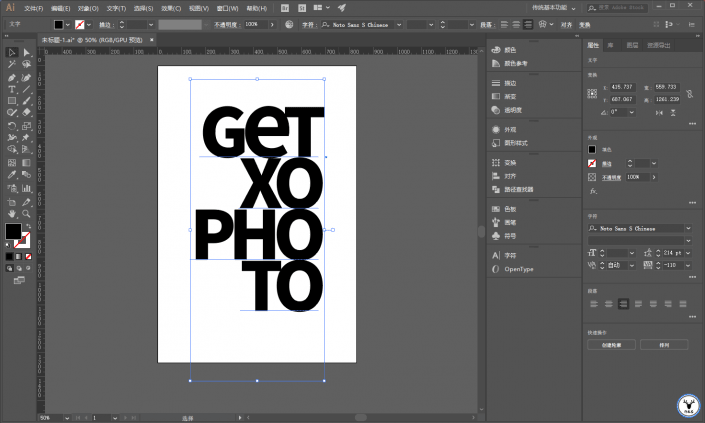
Type text:
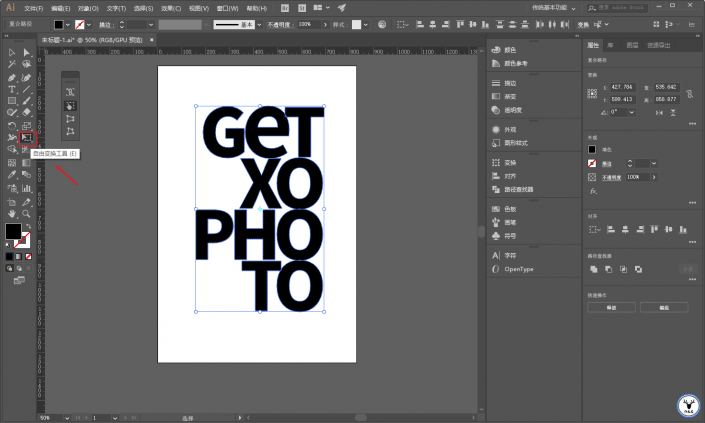
Ctrl+Shift+O outlines the text and ungroups it, then select the Free Transform tool:
Transform each part separately to create perspective:
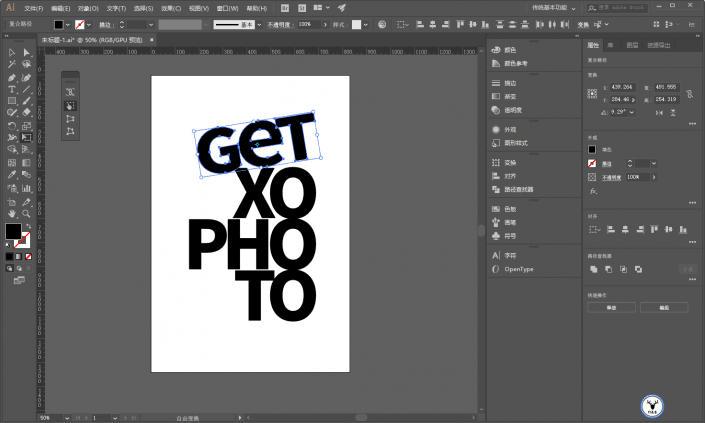
Just do it based on your feeling. Just make it look like a staircase. It will look like this after you finish it. Then you will find that some overlap more and some have larger spacing at the red arrows:
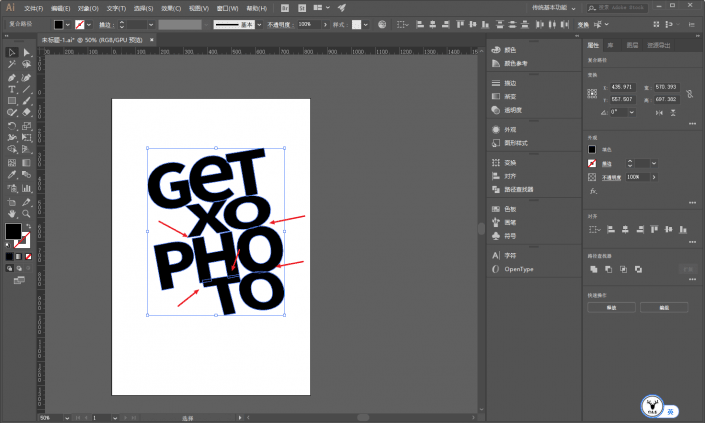
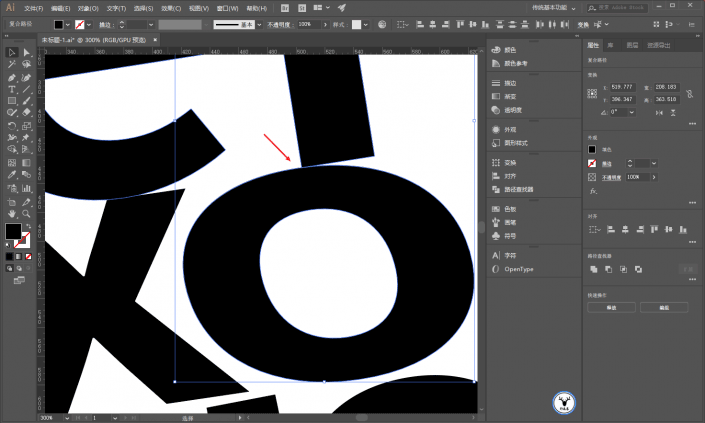
Adjust the details so that the letters just overlap:
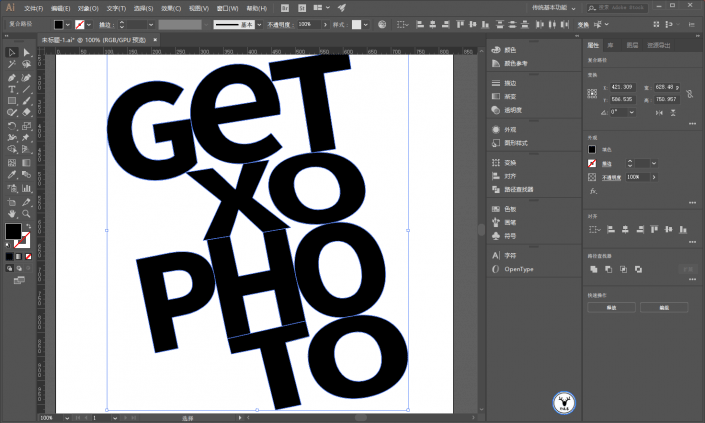
Be patient. When adjusting anchor points, it will be much easier to make good use of the alignment tools. The final result will probably look like this:
Copy it, change it to gray for easier observation, and then put it on the top layer:
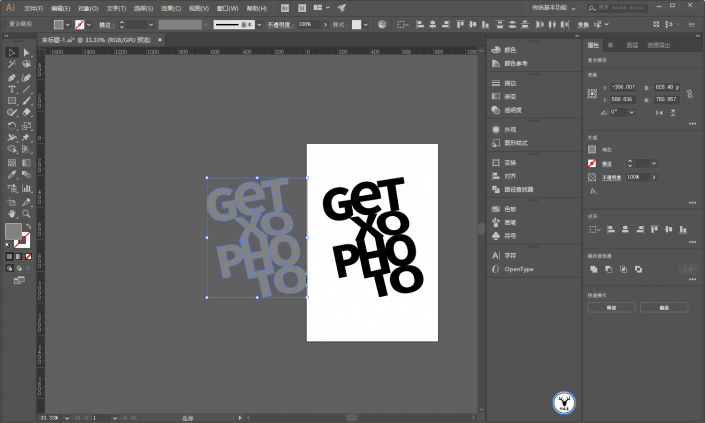
You can temporarily lock the upper letters, and then deform and twist the black letters below to make them look like projections:
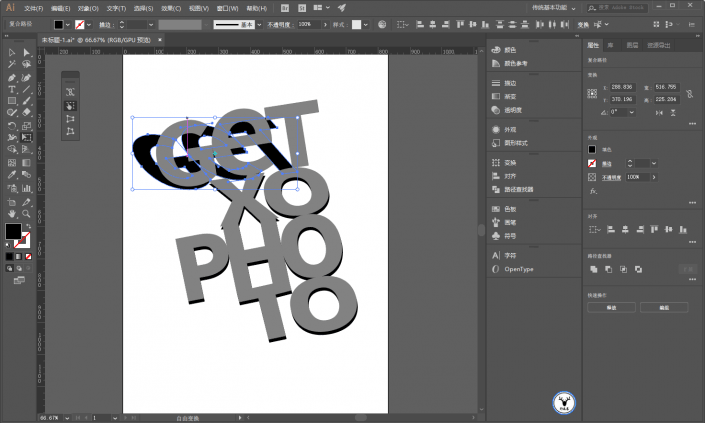
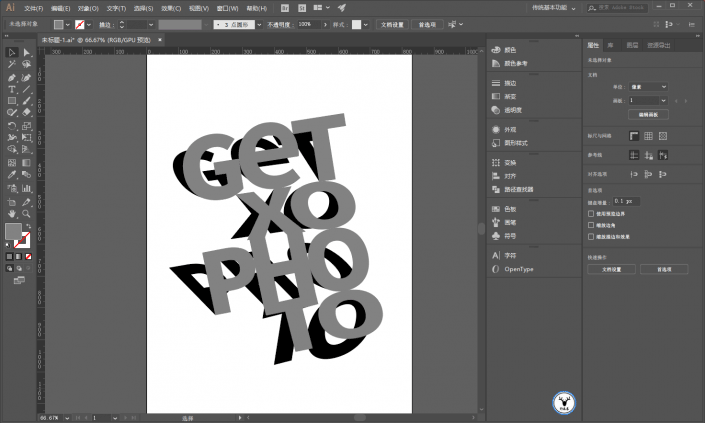
Then adjust the position of some projections, and the final result will look like this:
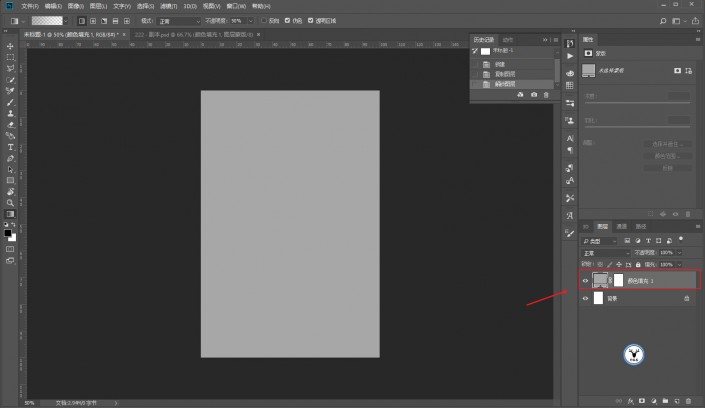
Next we need to operate in PS. Open PS and create a new canvas with the same size as Ai, then create a new solid color fill layer and choose a gray as the background:
Then drag each part into PS and divide it into groups. No need to say more about this step:
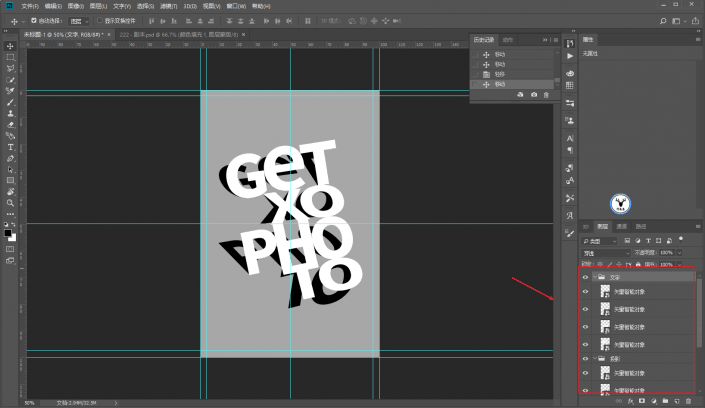
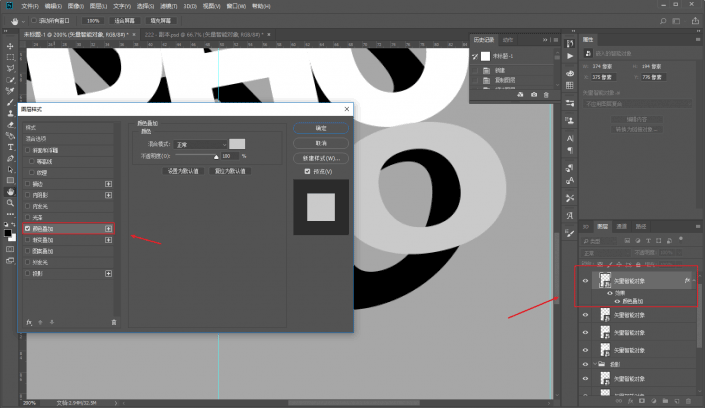
Add a layer style to the text layer – Color Overlay, and choose gray as the color:
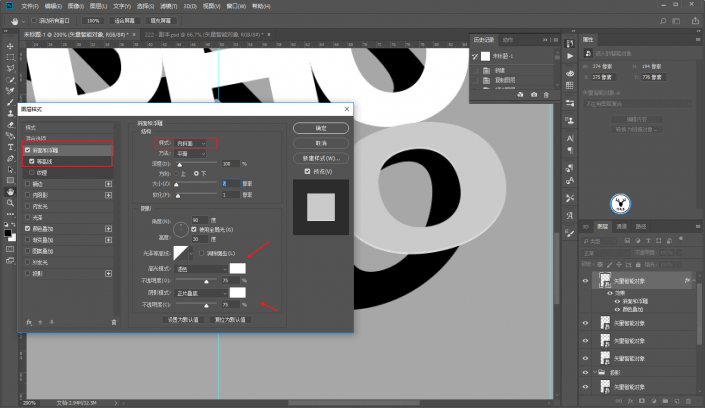
Then add bevel and relief, select inner bevel as the style, and adjust the parameters according to the effect:
After making one, you can choose to copy the layer style:
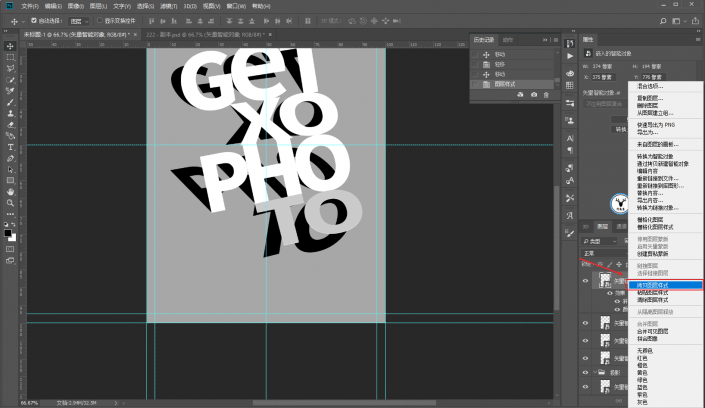
Just paste it to other layers:
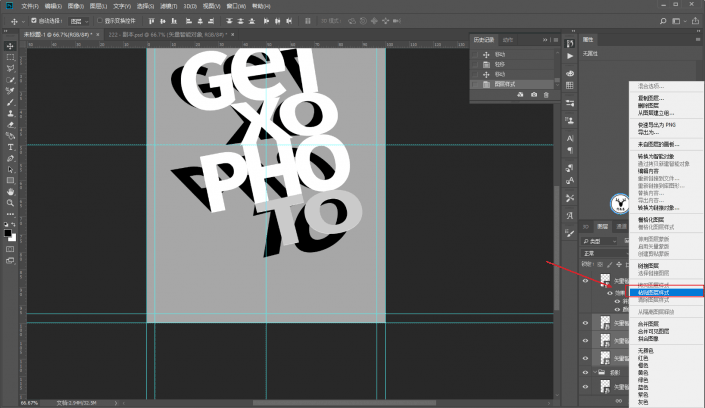
Add a motion blur to the projection, the parameters are up to you:
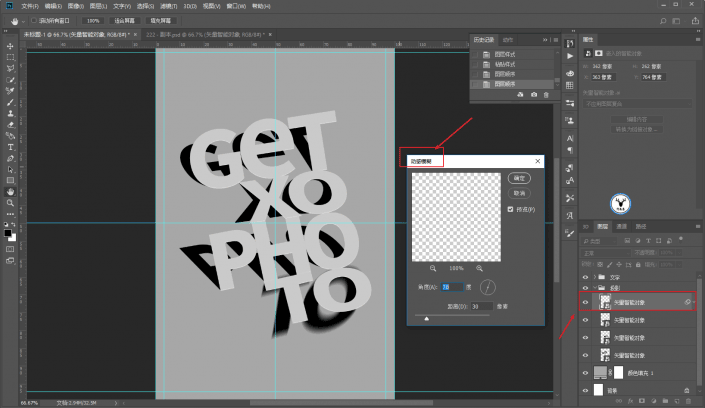
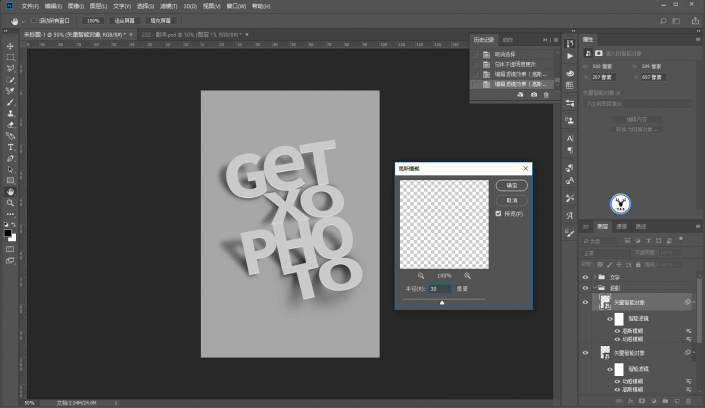
Let’s do another Gaussian blur with smaller parameters:
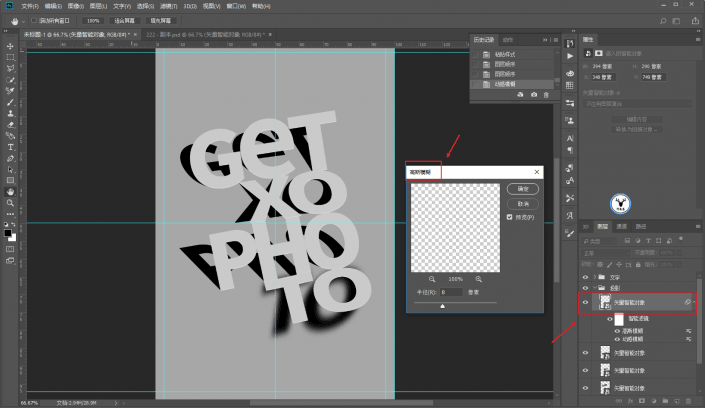
Once done, just copy the filter effect to other layers:
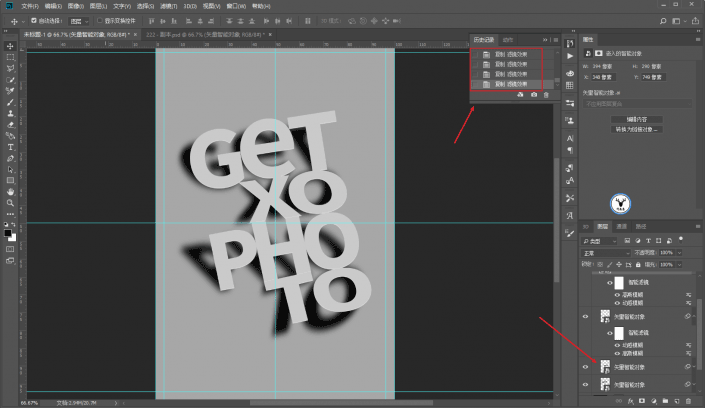
Change the blending mode of the drop shadow group to Overlay and lower the opacity:
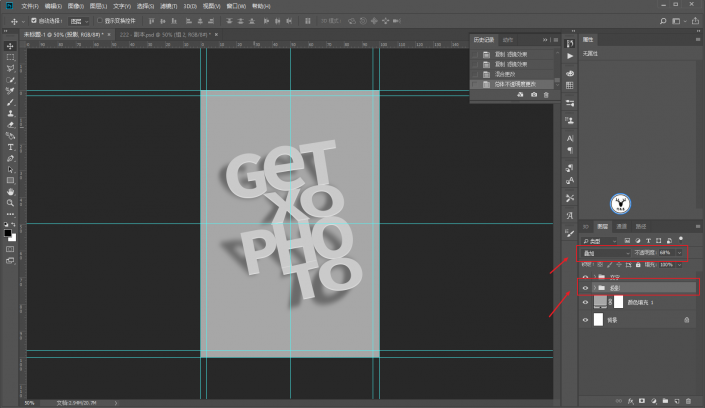
Below the projection group, create a new layer, use a black brush to load the projection selection, and draw in the appropriate position to deepen the shadow:
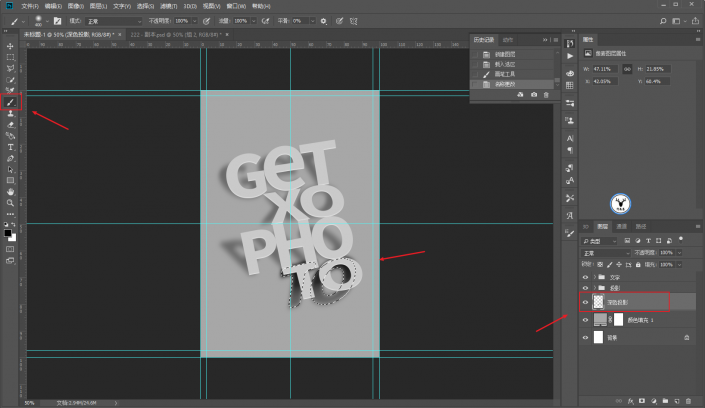
The opacity of the layer can be appropriately reduced, and then the Gaussian blur parameters of each layer can be adjusted as appropriate:
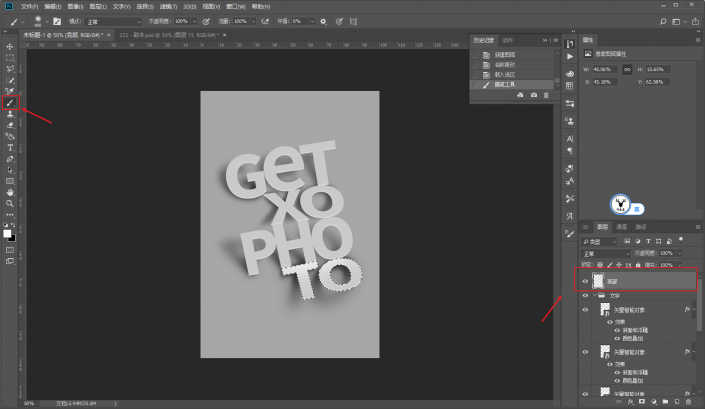
Create a new transparent layer above the text group, use a white brush to load the text selection, and draw the highlights:
Create a new layer in the same way, using a brush or gradient tool, and create some darkness on the background:
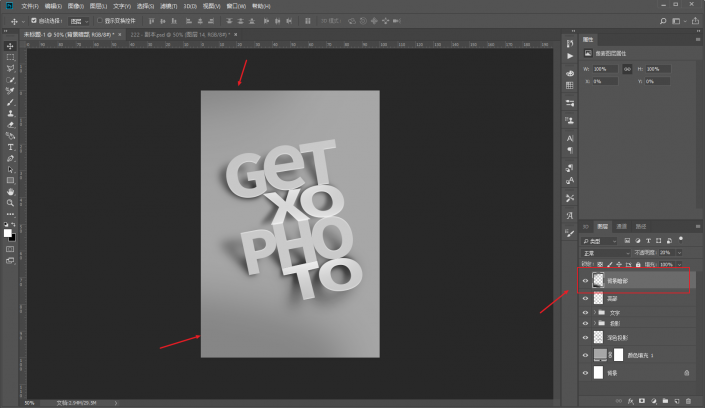
Also bring out the highlights of the background, blending mode and opacity. Let’s look at the effect. I won’t go into details here:
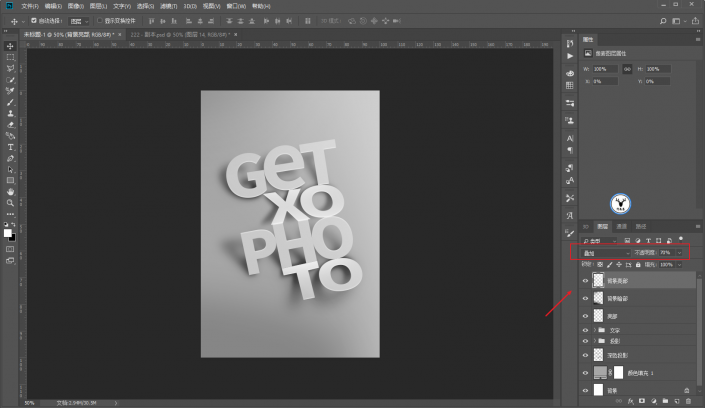
Complete:

www.16xx8.com
For more content, please follow the official account
This article was published by “Yelu Zhi”
Please contact Malu Yelang before reprinting
Private transfers will be investigated
This kind of poster can be said to be full of design and can be used in many later creative designs. Let’s try it together.
@野鹿志:
This tutorial combines PS and AI to create an origami effect letter poster. The text perspective and splicing of this effect can actually be done in PS. Students who like to use PS can complete it in PS. The same, according to Just make your own choice based on your own habits. The whole poster is very creative. Students can learn from the poster to make designs in other styles. With the guidance of the video, I believe students can do great. Let’s learn the specific tutorials through the tutorial.
Tutorial material: http://www.16xx8.com/photoshop/sucai/2018/s968719.html
Rendering:

www.16xx8.com
Video:
Operation steps:
Open Ai to create a new drawing board of any size:

Type text:

Ctrl+Shift+O outlines the text and ungroups it, then select the Free Transform tool:

Transform each part separately to create perspective:

Just do it based on your feeling. Just make it look like a staircase. It will look like this after you finish it. Then you will find that some overlap more and some have larger spacing at the red arrows:

Adjust the details so that the letters just overlap:

Be patient. When adjusting anchor points, it will be much easier to make good use of the alignment tools. The final result will probably look like this:

Copy it, change it to gray for easier observation, and then put it on the top layer:

You can temporarily lock the upper letters, and then deform and twist the black letters below to make them look like projections:

Then adjust the position of some projections, and the final result will look like this:

Next we need to operate in PS. Open PS and create a new canvas with the same size as Ai, then create a new solid color fill layer and choose a gray as the background:

Then drag each part into PS and divide it into groups. No need to say more about this step:

Add a layer style to the text layer – Color Overlay, and choose gray as the color:

Then add bevel and relief, select inner bevel as the style, and adjust the parameters according to the effect:

After making one, you can choose to copy the layer style:

Just paste it to other layers:

Add a motion blur to the projection, the parameters are up to you:

Let’s do another Gaussian blur with smaller parameters:

Once done, just copy the filter effect to other layers:

Change the blending mode of the drop shadow group to Overlay and lower the opacity:

Below the projection group, create a new layer, use a black brush to load the projection selection, and draw in the appropriate position to deepen the shadow:

The opacity of the layer can be appropriately reduced, and then adjusted according to the situation.Adjust the Gaussian blur parameters of each layer:

Create a new transparent layer above the text group, use a white brush to load the text selection, and draw the highlights:

Create a new layer in the same way, using a brush or gradient tool, and create some darkness on the background:

Also bring out the highlights of the background, blending mode and opacity. Let’s look at the effect. I won’t go into details here:

Complete:

www.16xx8.com
For more content, please follow the official account
This article was published by “Yelu Zhi”
Please contact Malu Yelang before reprinting
Private transfers will be investigated
This kind of poster can be said to be full of design and can be used in many later creative designs. Let’s try it together.

 微信扫一扫打赏
 支付宝扫一扫打赏

