
This tutorial uses PS to synthesize a fantasy scene. Students who have watched the movie “Jurassic Park” were shocked by the fantasy scene in the movie. We can only see these creatures that have been away from us for a long time through movies. So those Can we synthesize fantasy scenes in PS? Of course it is possible. As long as you are willing to learn, you can do it. The entire synthesis requires the addition of multiple materials. Please learn the details together.
Rendering:

www.16xx8.com
Post-processing:

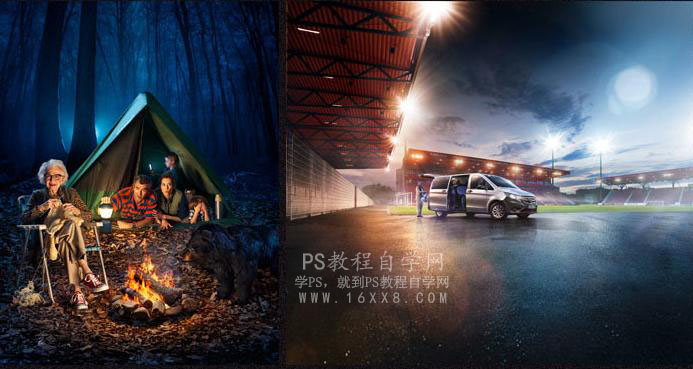
I won’t show you how to put together the manuscript here, because I believe there are still some friends who will read this manuscript. I will send you the assembled source files, and you can directly practice the first step in the post-production: When After the draft is completed, we need to find some color references, but we must find some color references that match the overall atmosphere of the manuscript we are putting together. We must not be too busy looking for them, otherwise the overall atmosphere of the picture will be uncoordinated. Effect!
2
Through the analysis of (Figure 1), the overall warm and cold atmosphere is more consistent with the collage. In fact, in the initial collage, no torch material was added. When I found the color reference picture, I found that if there was no fire, some warm colors were added. , it would give people an inexplicable feeling, so I later decided to incorporate a fire material into the foreground of the picture! Through the analysis of (Figure 2), the relationship between the overall light source and light and shadow is determined! Step 2: Adjust color first. Next, after analyzing the reference image, we begin post-processing. First, we start with the perspective of the entire image:


I won’t post the specific adjustment values here, because I found that many friends always learn the value of each effect adjustment when watching tutorials. What they learn is not the method. Everyone should pay attention: learn the method. Learn the method, learn the method! ! ! Method analysis: 1. Hue and saturation: Because the saturation of the material image is too high, you can adjust it through this function. If during the production process, the colors of some images are too complex and you want to unify them into one tone, you can Let’s think of a magical function in hue and saturation: “colorization”.
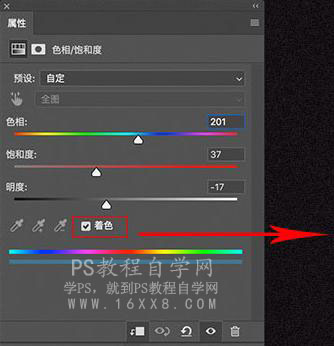
Function analysis: If “Colorize” is selected, the black image will be changed into a single-color color image, or the color image will be changed into a single-color image. For example, the entire image can be made only star red or other colors, etc. When you select “Color”, the “Edit” drop-down list in the dialog box will default to “Full Circle”. 2. Color balance: You can understand that color balance is a tool for adding color. For example, if you want to add some blue to the picture, then slide the corner marker in the blue direction!
Function analysis: There are three parts in the color palette: highlights, midtones, and shadows. I see that some friends only adjust the mid-tone part regardless of the material when adjusting, and ignore the shadow and highlight parts. This requires a lot of attention and needs to be carefully considered. I would like to ask if the shadows and highlights of this material need to be adjusted. If so, everyone should think of this function. OK, since the overall color grading of this manuscript is relatively simple, you can use these two methods to complete it! Everyone will unify the color tone of the actual picture first! (Complete the effect below)

When the colors are all unified, one thing has to be decided now. Should all the materials have a blue effect? This is where we can erase the unnecessary parts through the masks of all adjustment layers (complete the below Effect)

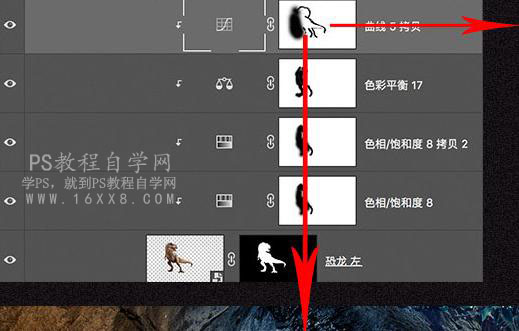
Step 3: Adjust the relationship between light and shadow. This step is also a critical step. We must use the position of the main light source to create the effect of the light and unlight on the material in the picture! Method analysis: My personal common method here is to use curves for adjustment. You can remember a small mantra “Turn off the lights first, then turn on the lights.” What does it mean? (Here I will use the dinosaurs that are greatly affected by fire as an example. )


Technique analysis: By darkening the overall bright part of the curve, the material can be made to feel as if it is backlit. This is also the effect we need. Of course, everyone has to control the adjustment by themselves! (This step is the so-called “turn off the lights”. Function analysis: After “turning off the lights”, we use mask to restore the light-receiving part to its original color. If you feel that the brightness is not enough, you can After creating a new curve to brighten the bright part again, I don’t think it is necessary in this picture! (This step is also called: turning on the light)

Then through this method, you can try to create the lighting and backlight effects of the entire picture (complete the effect below)

After completing the above effect, we need to create the projection in the manuscript! Method analysis: There are so many projection production methods. I will use hue and saturation as an example here! (Here I also use dinosaurs that are greatly affected by fire as an example) Skill analysis: Here we need to find the ground layer, which is easy to understand. Wherever the projection is cast, we find the corresponding layer, and then add hue and saturation. , reduce the brightness, because the projection also has color, not black, you have to use “coloring” to add color to the overall projection according to the environment! Then use “mask” to erase the shape we need!

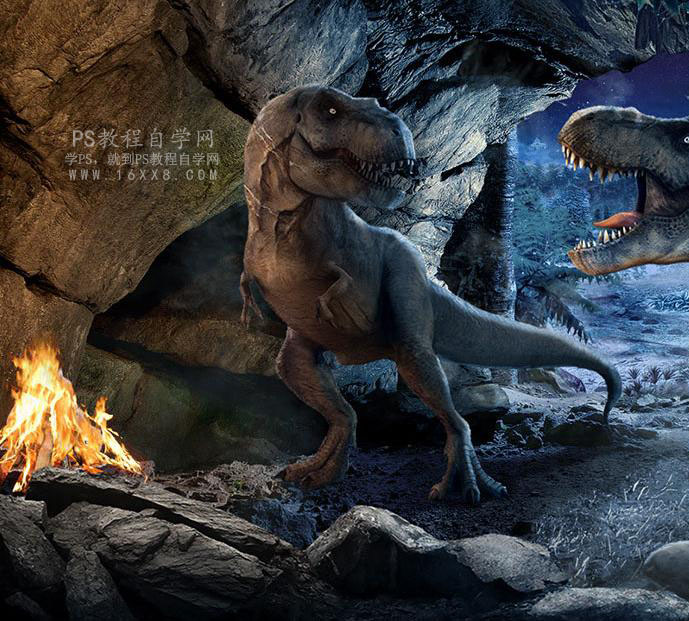
The approximate effect after the projection processing is completed should be as shown in the picture below! (Of course I hope everyone can do better)

Step Four: Light Sensing Processing This step is mainly done with a brush, of course with the corresponding layer blending mode. Method analysis: 1. Light source/highlight: filter color 2. Lighting: color dodge
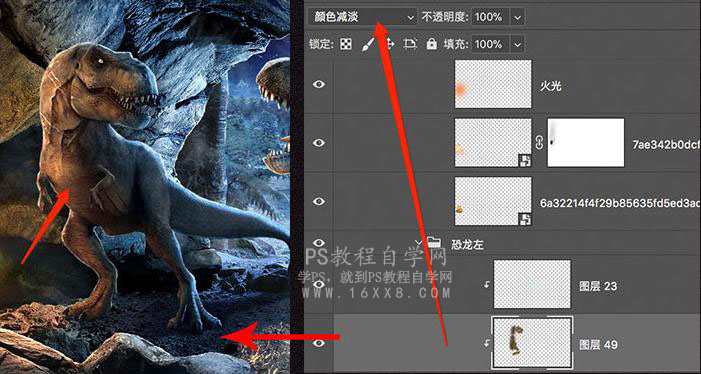
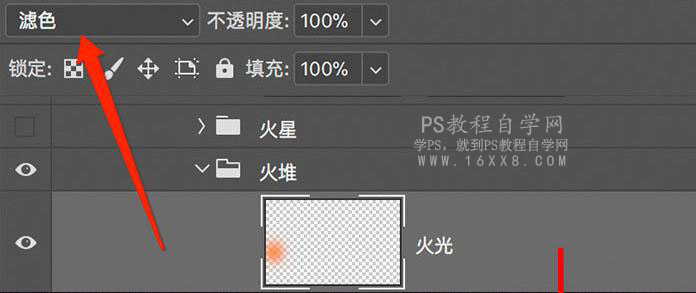

Through the above methods, you can make the light perception of the entire picture more detailed and realistic, and at the same time, you can add some materials to create an atmosphere, such as flames. . .

Step 5: Adjust the overall output! We can make some post-production adjustments through the CAMERA RAW filter as a whole! (Do not copy the numerical value)
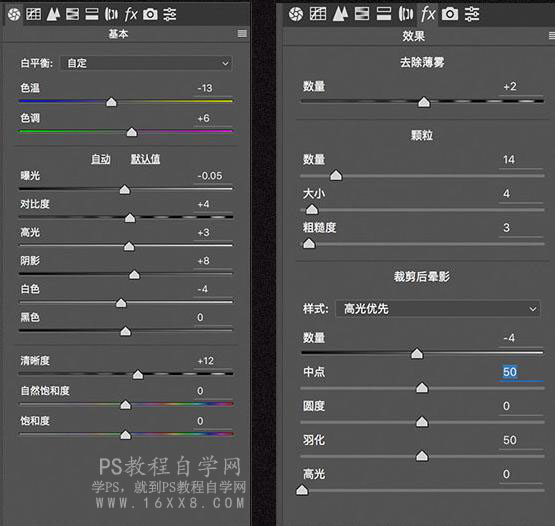
I believe that the students are already making it, so come and learn together.
 微信扫一扫打赏
 支付宝扫一扫打赏

